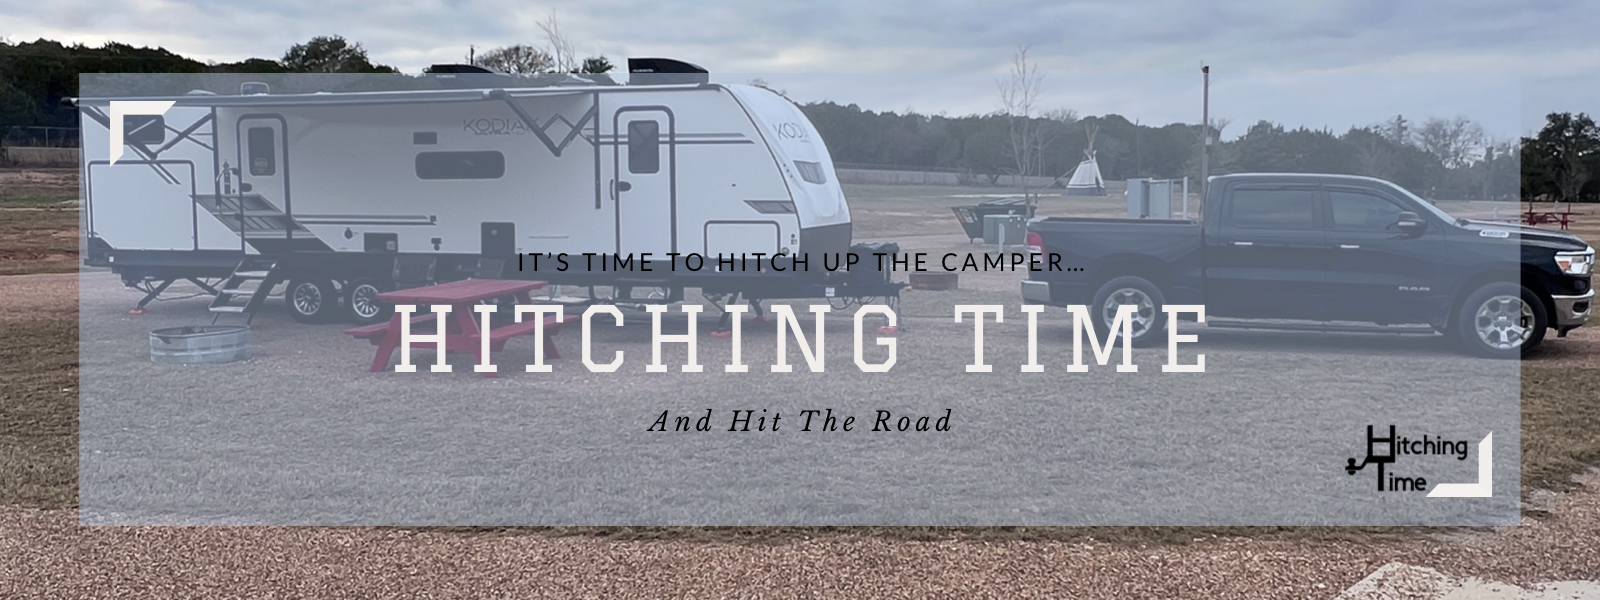
Hitching Time

Loading

Hitching Time

No Camper Blues

Have you ever had the no camper blues? Let me tell you, it stinks! We have been without a camper now for two weeks. In March, we spent almost three weeks in it and our whole family absolutely loved it. Our ultimate goal is to move into it full time and sell our home. We thought that we would be living in it already and have our house sold, but those plans took an unforeseen turn.

As you may have read in an earlier post, we purchased a membership to a local private RV park near where I work, called Tres Rios RV Resort. That membership allows us to stay there at no cost for up to three weeks! This is going to come in very handy over the summer at the very least. 

We plan on staying there for the max that we can according to my work schedule and then spend a week at home. This will allow us to enjoy our time in our camper doing what we want to do and it will allow our kids to enjoy all the things that Tres Rios has to offer. 

The icing on the cake of this is that we have about 40 solar panels on our home and can produce and send back to our electric company 50+ kilowatts per day on days that we are home. Since we won’t be home and won’t be using any power to speak of, we are going to be sending back even more. All the power that we produce gets banked for later usage until the first of the year, when the power company will send us a check for it!

We Have The Blues

Over the past five months or so that we have had our camper, we have gone camping several times. Most of those times were just for a few days, with the last time being several weeks. Every time that it is time to pack up and leave our kids get super cranky and depressed. They constantly say that they don’t want to leave. We no more than pull into the driveway most of the time and they start acting totally opposite of how they acted during the camping trip. 

I’m sure that it has something to do with the fact that there is less stuff to do at home. They can’t ride their bikes any more than in our driveway. There aren’t any activities to do. All this takes its toll on them.

Honestly, it takes a toll on us as well. We have pretty well stripped our house to bare minimum when we had our house up for sale and basically live in about a third of the entire house while we are there. This makes it where the stuff that is required of us in the house, like cleaning, is at a bare minimum. While we are home, my wife and I have this sense that we should be doing something while we are there and oftentimes at the end of the day we feel like we didn’t get anything done. Even though there really isn’t anything to get done.

What’s Wrong With Our Camper

The second camping trip that we took, we noticed that we had water leaking behind the toilet. I checked it out, because I am somewhat of a handy guy. If it was something easy, I could probably fix that. I looked at the connection and thought that maybe the leak was where the water line connected to the back of the toilet. So I tried to take the hose off and put some teflon tape on the connection and see if that fixed it. 

Unfortunately, it did not fix it and upon further examination, I realized that it was coming from the top of the connection, not the thread side. Being that we had wanted to spend as much time as possible in our camper now, we decided to install a shut off valve inline with the supply hose and just keep it off until we needed to flush the toilet. 

When we were packing up to go home after our next camping trip, I noticed that the black tank valve would not shut. After messing with it for a while, I accidentally bent the shut off cable which made it worse. Later while using a plumbing snake to make sure the tank was empty, we located a rather large piece of flooring styrofoam logged in the pipe where the gate shuts.

A couple days after we got home, we had a pretty significant rain storm and noticed that there was water all over our kitchen counter and down on the floor. Guess what, there was a leak in the window seal!

For this being a brand new trailer, that was literally only built four months prior to us purchasing it, it sure has more than its share of problems. The last problem reared its ugly head on our last camping trip. The last one was the first time that it had been warm enough that we had to fire up the second air conditioner in the trailer. When we came inside for the evening and were getting ready for bed, we found out that our bed was wet and it was coming from the A/C unit above it!

That did it for us, it was time to take it in for fixing and hope that the repairs wouldn’t take too long. We were in for a surprise…

Time To Take It In

While we were still on our last camping trip, we called and made an appointment to bring our camper in to get fixed. When we made the appointment, we learned that the appointment was only for a repair needed diagnosis. Once a technician looked at our camper, they would then have to turn it into the warrant department and wait on a response from them. While they were waiting our camper would be taken out of the shop and stored outside. 

We were told that if they had to order parts for whatever was wrong it could take four to six weeks to get the parts in. They did say if they had to order parts that we could come and get our camper if it was in safe working order, then we could bring it back after parts arrived and they would put the camper in the queue to be fixed. 

They couldn’t tell us how long that would take though. So there was a potential that we could be without our camper for two or more months! That was not what we wanted to hear. This is prime camping time!

Status of Our Camper

We dropped our camper off on April 4, 2023 and were told at drop off that it would be three to six days before it would be looked at. That was more than what I wanted to hear, but the dealership we bought it from is the #1 selling towable dealership in the nation, so they are pretty busy. Nothing could be done about the time frame so it was something we just had to accept.

The following Tuesday, we still had not received a call saying that they checked it out yet, so we gave them a call. We were told then that they were running behind and they were closed on Friday and Saturday for Easter and that it would hopefully be looked at by the end of the week or the beginning of the next.

By the two week mark, we still had not heard anything on the status of it and honestly I was getting a little upset. I tried to call in and talk with the person that was our contact, but she did not answer so I had to leave a message. A couple hours later, I still had not heard back from her so I called again. This time they told me that she was not there that day and sent me to someone else to try and answer my questions.

When someone finally came on the line, she said that they did get it in and was able to determine what was wrong with it. This is what we were told:

  1. The handle on the black tank was bent. Nothing was said about the chunk of styrofoam that we saw inside.
  2. The flush system on the back of the toilet was leaking and would have to be replaced
  3. The seal around the kitchen window has some holes in it and would have to be patched
  4. Some of the hoses in the a/c unit were not sealed where the connections were and was causing the cooled air to be mixed with the outside air causing the condensation

Basically all the stuff that I figured that it was, but unfortunately unable to repair myself. I guess I am going to have to start learning so this doesn’t happen again.

That was yesterday. Today I got a call from our actual rep which basically said the same thing. However he did add that our camper had a recall on it. One that had to do with electronic stabilizer jacks. She said that the back of the switches are not water tight and there is a possibility that while we are driving down the road the jacks could start extending on their own. 

WOW!

Just that part of it could be three to four weeks to get replaced. Hopefully they can fix the other stuff now and can take it back when the new switches come in, if it is going to take that long.

So now we wait…

We wait on them to hear back from the warrant department. We wait for any parts to come in that they have to order. Then we wait for them to get back to our camper to get it fixed. Then more than likely, when they call to come and pick it up we wait until my day off to go and get it.

Thank you for taking the time out of your day to read this post. Please subscribe to our email list to get an email when we publish a new update on our adventures. We hate spam as much as you do, so we promise to never sell or otherwise distribute your contact information with anyone! To sign up, simply fill out the form below. Once you click submit, check your email and you will need to verify that you were the one to sign up for our email list.

We would hate it, but, at any time, if you do not wish to receive emails from us for whatever reason, there is a link at the bottom of every email that will unsubscribe you from our email list.

Subscribe

* indicates required

Until it’s time to hitch up the camper again,

Happy Camping!

NOTE: This is an old post from when earlier this year(2023) when we first starting our blog. I am posting old blog post first to get caught up the present then I will start posting new ones.

Tres Rios RV Resort – Campground Review

A couple of months ago we signed up for a free weekend at another campground in the Glen Rose area campground called Tres Rios RV Resort. We were initially scheduled to camp in February but due to weather conditions, we postponed it until this weekend.  

Tres Rios RV Resort is a private campground. Meaning that it is not open to the public. Why is this important you may ask? Think of this for a minute. Since 2019, first time RV owners have skyrocketed. There were nearly four million more RV owners between 2019 and 2020 alone! As the number of RV owners grows, the availability for RV spots decreases. In that same time frame there was only a 1.7% increase in RV parks. That means there are a bunch of new families looking to camp and only a very slight increase in place for them to camp.

To break that down even more, of the 15,462 campgrounds in the US as of 2022, approximately half of those are available to the public. Making the available spots for the 86 million households that own a camper to camp in even smaller. 

On top of all of that, spot rent for campgrounds have about doubled in the past five years. Spots that averaged about $30-35 a night, now are about $60-70 a night. There are some campgrounds that are booked out for over a year! 

The Park

Tres Rios is located just outside of Glen Rose, TX, the “dinosaur capital of the world”! It sits on 47 acres where the Brazos, Paluxy Rivers and Squaw Creek come together. It is actually where it got its name from. Tres Rios means Three Rivers. 

RV Spots and Rentals

The park has 238 RV spots, 19 cabins, and 5 cottages. All RV spots have full hook ups and 90% of which have 30 and 50 amp service. The RV spot that we stayed in was approximately 25×70, which appears to be about what most of the spots are. Some are smaller, some are a little bigger. The spots are also perpendicular to the roads, making it a little hard to park compared to ones that are slanted, but not by much. A large majority of them are pull through sites as well.

Playground

Along with the large number of RV spots and cabins, there are a ton of things to do to keep you and/or your kids busy while you are camping there. They have a fairly decent playground that has two playground areas with a slide, climbing wall and several swings. There are also several climbing tires that are buried in the ground and a large tractor tire that has been painted and made into a large sand pit.

 I spoke with our point of contact this weekend and she said that there is a new playground that is scheduled to be installed this year, around summer time, that is going to be a lot better. It will be a large playground system with several slides, swings and other playground items, and the best part is that it will all be covered. 

I wonder what else is planned this year…

Pool

There is a pool located at the back of that park. It isn’t the biggest pool I’ve seen at campgrounds but it is there to swim in. It was built in 1919 by the YWCA. At the time it was the first and the largest inground pool built in Texas. At the time of this post, it is closed so I was not able to go into the fenced area of the pool but from the looks of it, it is about 30’x60’. It ranges in depth from 3’ at one end to 8’ deep where the drain is and the back to 6’ at the far end. At the shallow end of the pool, there is a covered area where parents can sit and watch their kids in the pool. It also serves as an area for a screen for pool time movies! The pool is open from April until October(?)

Yard Games

At the back end of the park, there is a large circle driveway where all the activity area is. In the middle of the circle drive is a volleyball net, tether ball, and several horseshoe pits. It is also the area where they have cornhole tournaments and other yard game events.

Activities at the Park

One of the things that I love about Tres Rios over some of the other parks that we have stayed at, Granted it is only a couple that we have stayed at so far, is that they have planned activities everyday! There is an organized kids activity Wednesday through Sunday at 9am, cards/games everyday at 2pm, Bingo every Friday, cornhole tournaments on Thursdays and the list just goes on and on! You can check out their activities calendar on their website.

On Site Restaurant

During the middle of the year, there is an on site restaurant that serves breakfast on the weekends. We have not had the chance to try this out because it wasn’t open yet at the time of this post, but we will give it a shot when it does open. The building, however, is a very nice building. There is seating for about 75 people or so. The decor inside is an industrial rustic vibe. Stone walls with an open rounded roof which is bare to the inside and hardwood floors. The air conditioning ducts are exposed giving the industrial feel to it.  

The Cost

Tres Rios is one of nine properties owned by Ocean Canyon Properties. All of which are included in your membership. You can goto the Tres Rios website and fill out the form on the page or call the number listed and get a free 3 day, 2 night stay. The only “catch” to it is that you have to attend a sales appointment which lasts anywhere from 90 to 120 minutes. In this meeting they will show you the park, show you all the other parks that are in the network, and the benefits of having a membership. 

A couple days before we went on our free weekend, we looked at the reviews of the park on several different websites. These reviews ranged anywhere from six months to 10 years old. A bunch of the reviews stated that their sales person was very pressuring and that when they turned down the membership they were rude to them the rest of the weekend. We honestly had second thoughts about going just by reading the reviews. 

I am very glad that we did though! 

Our sales meeting lasted about two hours, mainly because my wife and I took a little time to talk after the sales pitch was over. Our sales person was not pushy at all. She was very friendly and was very upfront with us from the very beginning of the meeting that the highest pressure that was going to be put forth is that the offer for the premium membership that included all the parks in the network would expire once the sales meeting was completed. After that, the only option we would be able to get would be for just Tres Rios alone.

When we first heard the total price that the membership cost, we were shocked. However, that shock didn’t last long. They do in house financing for seven years. This makes your monthly payment down to a price that is affordable. I’m not going to put what our price was because your price may be different than mine because of discounts and how much we put down, etc. I will say that the price per month that we are paying is less than a weekly price at many of the other campgrounds that we have looked at! At the average price of daily campsites, it would only take 5 days to more than cover the monthly payment.

Our Plans

One of the limitations that we had prior to getting this membership was having to budget and save for a month to pay for the campsite when we wanted to go camping. This limited us to only about one weekend a month that we could go because it would cost us about $150-180 for a three day weekend camping trip in just the site alone.

With this membership, we can stay at Tres Rios for up to three weeks at a time. Another bonus to this is that it is only about five minutes from my work. Will we jump right in staying three weeks at a time right now, no, but the option is there. This option will be especially good during the summer when the pool is open. For now, we will shoot for a week or two a month and work up there. 

Once we decide to go full time RVing, Tres Rios will be perfect for us since it is so close to my work and with my schedule, I would only have a long commute about two days a month. We are so ready to take this step and hopefully, one day soon, our dream will come true.

Final Thoughts

We were very skeptical before we went after reading all the reviews we did, but I am so glad that we decided to go. I told my wife, worst case scenario, we get a free weekend and have to waste two hours listening to someone talk and we get a blog post to write. I am glad that I was wrong, and that all the reviews we read were either outdated or incorrect.

Would we recommend going to Tres Rios and getting a membership? Absolutely! The gains of the membership is worth so much more than the price tag that is required. 

Until new time…

Happy Camping

NOTE: This post was posted earlier this year(2023) when we first started our blog. I am posting old post first to get caught up to the present and then I will start putting up new posts.

Problems With Our Camper

For the last couple weeks, we have been camping at Tres Rios RV Resort in Glen Rose, TX. A review of it will be out later this week, so make sure you follow us on social media and here on our blog to see when that comes out! Anyway, We had an absolute blast while we were there, and none of us wanted to go home. Unfortunately, we did have a choice because we had to get our camper worked on and when we got home I found out I have a problems with my airbags as well!

After we got home, I noticed that my airbags would go off about every 30 seconds or so. That told me that I probably had a leak. So I aired up my airbags to about 40 PSI and went to both sides of my truck to see if I could hear anything.

I watched my app for it when I was airing it up and saw that it showed the current PSI as it was airing the bags up. So I sat and watched it for a minute. It would air that airbags up to 40 PSI and turn off. When it turned back on it showed that it was at 30 PSI! That told me that I definitely had a leak! I was loosing 10 PSI every thirty seconds or so.

I was sitting on the passenger side of my truck while I was doing this so I checked it first. I got down as close to them as possible and listened. I didn’t hear anything. So I went around to the other side. I waited for the compressor to air them back up and shut off and listened again. This time I hear a hissing sound!

Down on my hands and knees I went. I looked at the airbags hoping to see something but I didn’t I figured I’d probably have to get some soap solution to find it so I started to get up. That’s when I noticed this…

Well, I didn’t have a leak. I had a full break! Well more of a melting of the air line. The air line was melted against the exhaust! Why the air line wasn’t tied to something to keep it away, I don’t know.

Camper Problems

The reason that we had to come home in the first place was because we were having some issues with our camper and had to take it in for service. Our black tank valve would not close, our toilet wouldn’t stop leaking and one of the A/C units would freeze up on us.

We made the appointment with the dealer that we bought it from and they advised us that once we brought it in for the initial appointment, it would take about a week for our RV to be looked at. After that they would have to send the diagnosis into the warranty place and see what was covered and order parts if needed. That could take up to 4-6 weeks to get the parts in and then the time it took to install them! We really didnt want to be without a camper for two months, so we tried to call a Mobile RV repair person that worked with out warranty.

We called about six different people and most of them all told us that they don’t work on black tank issues! We finally found one that said he did, but he charged $150 an hour for it! Hoping that it would be just replacing the black tank gate and it should take more than an hour to do, we decided to have him come and look at it before we took it to the dealership.

While waiting on him to get there, we looked at the issues and tried to see if we could fix it ourselves.

First off the Toilet

On the back of the toilet, there is a supply hose that goes from that water intake line to the back of the toilet. I disconnected it from the back of the toilet and put some teflon tape on the treads and put it back on. I ran our water hose to the RV and gave it a shot. I flushed it several times and didn’t see a leak. Awesome, maybe I fixed it. I let it sit for a few minutes and then came back to see that there was water on the floor behind the toilet!

I got down and watched it for a while.

Drip…Drip…Drip…

Yep it was still leaking. I felt around and tried to see where it was coming from. Unfortunately it was coming from the connection where the hose screwed into, but on the top side. That meant that the entire back assembly would have to be replaced. Something that I had no idea on how to do

Black Tank Issue

The valve handle for the black tank was stuck in the out position and it would not go in.

Our RV is equipped with a black tank flush out, so we ran it for a while to make sure there wasn’t anything inside. Then we ran a water hose up the outlet pipe and got a bunch of stuff out of it. Thankfully we had something to catch all the stuff coming out. We tried that valve again. I got it move out some but it wouldn’t go in any more. So we tried the hose again.

We worked on it for about an hour and never could get it to close. So we tried sending our camera snake up the outlet and see if we could see anything. What we found surprised us, but also to our surprise, both the mobile RV tech and the intake person at the dealership said it didnt surprise them.

Yep, that is a chunk of insulation from the floor sitting at the gate of our black tank. No wonder it wouldn’t close!

Camper Dropped off

The next morning, I took the RV to the dealership and got it dropped off and went to the place that I got the airbags installed to talk to them. I was all ready to cause a big stink about how they should’ve secured the lines. I didn’t get to cause that stink though because when I showed the service guy the picture, he said, “Oh my goodness, those lines should’ve been secure so that wouldn’t happen, do you have about 15 minutes to wait and we can get that fixed for you?”

So here I sit, writing this blog post while I wait for them to get done with my truck. Sure enough, 15 minutes later, they pulled up with my truck all fixed. Actually it is better than it was before. When they first installed them, I had to keep them at 10 PSI for the compressor not to run every 10-20 minutes, instead of the 5 PSI that is the minimum. So far, I have driven to another store about 20 minutes away to get some other things, and I have not heard the compressor kick on once.

Now We Wait!

Now that my truck is fixed, and the RV is dropped off, now we wait to hear back from the service department on how long it will take to get our RV fixed before we can go camping again. I hope it doesn’t take to long and we can make it to our next scheduled trip.

I will post again when we know more, so until then…

Happy Camping!

NOTE: This post was originally posted the first part of this year(2023) when we first started our blog. I am posting old blog posts to get us caught up with the present and then I will start posting new ones.

Remodeling our Bunkroom in Our Kodiak

By now, we have gone camping a couple of times. Spreading several nights in our camper has given us an idea of what we like and don’t like. After spending months trying to find the right floorplan, you would think that it would be exactly what we wanted.  If you think about it though, even though you find the best option available, something can always be changed to fit your life.

Why Are We Remodeling

So why are we remodeling? While most of our RV is good, the one thing that we  didn’t like is that the bunk room doesn’t have a lot of room in it. There is basically just enough room for one person to walk between the beds. The other concern that we had was our kids falling off the top bunks. We have already had one of our kids fall off a top bunk in our house, thankfully he landed on the bed below. 

This is what it looked like when we bought the RV. On the left was an offset bunk bed and on the right was a top bunk that folded up and a Jackknife couch underneath. My wife can think very fast on her feet and often makes things work the best with the littlest amount of time required. So she suggests that we remove the bottom bunk on the left, take out the couch, and build a new double bunk on the right. Then build a cubby shelf on the left for clothes, shoes, and toys.

This would give more floor room for our kids to play on rainy days and more storage for their clothes. The only storage in the bunk room before was two drawers under the bottom bunk and one very deep cabinet.

That is not enough room for three kids, their clothes, toys, and shoes!

When we rebuild the beds, they would need ladders so we decided to incorporate a bed rail on the side as well. This solved the concern of our kids falling off the top bunk. Now it was time to sketch out our plans so I could do the figuring out how to build it and the materials that we would need.

While my wife is the idea/designer person, I am the one that figures out how to do it. Then we both work together to make it happen! We make a great team if you ask me.

Demo

With our new design figured out and material bought, it was time to get rid of the old and make room for the new. That old was only a couple of months old but that’s not the point. We took out the lower bunk, couch, and upper bunk on the right. Here is the clean slate that we had to work with

When we took out the lower bunk on the left, we noticed that we had the power wire and the rear water connection that we had to deal with. So we had to change our plans slightly to make a cover for the wires but also be functional in the space. My wife jumped into action and said, let’s make a step to cover the wires and function as a seat to get dressed or put on shoes too.

It took all of about thirty minutes for my wife to completely demo the bunk room while I was making lunch for the kids. She is a beast when she sets her mind to something! One thing is for sure though, it really opened up the room!

Building New Bunk Beds

Now that the bunk room was empty, it was time to start rebuilding. The plan was that my wife would start working on the bottom bunk on the right, while I started working on the cubby shelf. She started measuring and I was off to my workshop. It wasn’t long before I was called back into the camper to get my opinion on something and we just started focusing on the bunk beds together.

That is normally the way that it works out when we do projects, together is better!

Trying to figure out where the support boards would go for the top bunk was probably the most challenging of the entire build. We wanted it high enough for our kid on the lower bunk to have enough room to sit up on her bed. In the same thought, we wanted our son on the top bunk to have enough room too. We also needed to consider how big the top bed structure would be. I figured that I could cut a 2×4 lengthwise at an inch and a half and it would be strong enough; after all that is what the top bunk was made of from the factory. 

Off to my workshop for me it was, while my wife finished putting the bottom bunk together. I ripped a few 2×4’s lengthwise at one and a half inches and drilled some pocket holes in them to connect them together. I cut the back board to length and went inside to attach it to the wall pretty much where the original board was screwed to the wall. The the side boards went on the ends. I decided to over-craft it some by using three center cross pieces instead of just two that would’ve worked. After the center pieces were in place, the front board was screwed into place. 

With the framework done, we put a ½” piece of plywood on top and screwed it into the framework. It made it pretty solid. We probably could’ve stopped there and been just fine. However, we still didn’t fix one of the problems that we had about the bunk beds; our kids falling off the top bunk and how to get up on the top bunk too. 

Now it’s time for the ladder

We had talked about putting a rail fence along the side with slats about every six inches or so. We liked the idea so I ran with it. First though, we needed a way to get up to the bed. For that, we needed to build a ladder. 

Again I went back to a 1 ½ x 1 ½ board.  This was the perfect size for strength and for slimness. I also took my router with a 1” roundover bit and rounded off the top of each rung to make it easier on our kids feet. I put it together with glue and a pocket hole screw. Then I rounded over the side rails as well to make them easier to hold onto. 

After it was all put together, I took it out and installed it onto the bunch. Not only did this give our kids a way to climb up to the top bunk, but it also gave a close to center support for the bed, making it VERY sturdy. 

Next up was the side railing

I hade planned on using my table saw to cut a groove into bottom and top boards. However, after the second cut, the motor on my table saw all but seized up. I was forced to use my router to cut the groove. While it worked, it wasn’t as neat as it would’ve been on the table saw. 

With cutting a 2×4 down to an inch and a half, it left a piece about a half inch thick that was perfect for the slates in the side railing. So I took those pieces and cut them down to about 11 inches long and put them in the grooves and glued them in place and tacked them with a brace nail to hold them while the glue dried. Next I took my router and rounded off the top board and sanded everything really well.

The next day I took that piece out and attached it to the side handle of the ladder and the other end to the wall. It didn’t match up perfectly to the ladder rail, but it was pretty close. 

THAT’S IT, BUNK BED IS DONE!

Building A Cubby Shelf

With the bunk beds done, it was time to move onto the cubby shelf. We decided to build a four foot by four foot 12 cubby shelf. This allowed for a four by four grid of approximately 11”x11’x12” deep each. We decided to go with 1×12 yellow pine boards rather than plywood. That way, later, when we stained them they would look better. 

I started out by cutting six boards to four feet. These boards would be for the outside borders and the three horizontal shelves. On the border boards, I routed out  grooves approximately ⅜” deep at 12” on center. This is where I goofed a little. 

On the ends of each board I routed half the thickness of the boards on each connecting piece then put them together to make a solid matched corner. I should have measured from the edge of the joint instead of the edge of the board beforehand.

 I discovered after everything that built that the two outer cubbies were about ⅜” smaller than the middle two were. However, this defect is minor and the totes that we bought for this shelf still fit. 

I got lucky!

Once all the grooves were cut, I started putting it together. I glued all the solid pieces together and then put a few brad nails in to hold them while the glue dried. Once the full length pieces were in place, I cut the upright pieces and slid them into the grooves that I cut. I made another oopsy in this process as well, because a couple of the grooves that I cut were a little too small for the board to seat well in them. However, it was too late to try and fix it because it was all glued together. 

I had to make due with what I had and did manage to get most of them to seat most of the way. I glued each of these pieces as well and the clamped all of them together and let it sit overnight to dry.

The next day, I moved it inside and passed it off to my wife who did an amazing job at staining it all. 

Building the Ladder and Bed Rail for the Last Bed

The ladder for the last bed was basically a redo of the first one, but I learned from my mistakes and made this one better. I made it all in one piece before I rounded the edges so it all flowed together very nicely. This one turned out better because when I made the channels for the rail slates, my table saw went out so I had to do it with a router. Let’s just say, it didn’t turn out the best. 

I also had to make a step for the bottom that would hide the power and water connection that came in under when the bottom bunk was. For the step, I used a piece of ¾” plywood. I cut it into a trapezoidal shape and rounded over the front of it to make it look nice. I then made some 1 ½” x 1 ½” risers to hold the step in place and attached it in place to the wall and cubby shelf. 

I took a piece of the ¼” plywood that we took out from the bottom bunk and cut it to fit on the sides of the step to hide power and water connections. I then took the ladder and side rail piece and put it on top of the self and over the cubby shelf and screwed it to the shelf and the step. 

Finished Remodel

After everything got stained, we were done!

I will say that I really like the way that it turned out. As far as space goes, our kids have so much more. They also have more storage for clothes and toys. The only real thing that was lost was the jack knife couch but honestly, I really don’t see them sitting on it anyway. I think this is the way it should’ve been from the factory, but hey, I’m kind of partial too.

There are two things that I did that I wish we wouldn’t have. 

The first one is that I wish I would’ve made the first ladder and railing the same as I did the second one. The second one ended up looking a lot better than the first because I did it as one piece. However, just like with anything in life, the second time you do something is always better than the first. 

The second thing is when we installed the bunk beds, I misjudged how thick the slide wall was and ended up using screws that were a little long and they ended up going through the side of the camper and the bottom of the slide. I changed all the screws out when my wife noticed it for shorter ones and used clear silicone to seal the holes up, but you can still see them. The ones that went out the bottom, however, I would’ve had to tear apart the entire bed to change them out so I just cut them off and sealed them.

All things considered though, we think that it turned out very well and our kids love the room. Honestly, I think this is the way that the manufacturer should’ve done it to begin with. On the flip side though, I understand why they put the jackknife couch in and made it the way that it was. With the couch, there is a place to side when the couch and the top bunk are folded up. There is also another place for someone to sleep when they are folded down. 

What do yall think about the changes that we made? Leave a comment below and let us know. Also, please follow us on our Facebook and Instagram pages for some behind the scenes looks and to get notifications on new posts.

Until it is Hitching Time again,

Happy Camping!

NOTE: This post was originally posted the first part of this year(2023) when we originally started our blog. I am posting old posts to get caught up with the present then I will start posting new ones.

Dinosaur Valley RV Park – Starting Slow

It didn’t take long after we picked up our new camper to make our first reservation at a nearby campground. We picked up our new 2023 Kodiak Ultra-light 332BHSL bumper pull camper on Monday and by Wednesday we had our reservations made for the following week. We decided to start slow on our first camping trip and camp at a park that was close to home for several reasons. 

First of all, when you have never camped in your own RV, you may think that you know what you are going to need, but if you are anything like us, there will be stuff that you don’t have or that you forget to load. Camping nearby allows us to be able to run home if we forgot something that we absolutely had to have but far enough away that it felt like we were away from home. 

We are really bad at this! It never fails when we go on vacation we always forget something. This time is no different as it turns out. You can plan and make lists, and check and double-check things but it always seems that we forget one or two things. This time was no different. We forgot to load our folding table and camping chairs for our kids. 

Secondly, if you are not used to pulling a big trailer, taking a short trip for your first excursion will help you get the feel for it without having to drive a long distance. This trip was the second time in my life that I have pulled anything bigger and heavier than a 16-foot flatbed trailer. Let me tell you, there is a big difference between pulling a 16-foot flatbed and a 34-foot RV. 

The first time that I pulled it, I had some very weird stuff happen to my truck that you can read about in the post, Warning Lights Galore. This time though none of them came on so maybe it fixed itself.

Heading to the Campground

We had taken a sneak peek of the Dinosaur Valley RV Park a couple of weeks prior to this trip and our first impression of it was that it was pretty nice. It has a very nice atmosphere to it and even though it is still under construction, it is a pretty nice park. 

This trip we went with our camper ready to camp. I got off of work and went home to finish loading the camper and do some last minute things. We hooked up and off we went! Pulling it was fun and there are definitely some things that I am going to have to do to my truck to make pulling our camper a little easier. 

We got an equalizer hitch to help level the truck out some but I think we need a little bit more so we are going to get some airbags put on my truck before we go camping in the spring. More about those in a later post. 

We arrived at the park about 4 pm and checked in. The camp ground was pretty empty being that it was the week before Christmas. We picked a spot that was pretty close to the playground so Jess and I could sit outside our camper and our kids could play on the playground and we could still see them. 

Setting up the camper for the first time

We had partially setup our camper in our yard a few days prior to camping and slept in it for one night. We only had power hooked up so we didn’t have water or sewer hooked up to having running water. This time was a little more extensive. 

We found our spot and got parked. We failed to check and see if the trailer was level from left to right so we we a little off level but it wasn’t to bad. We got unhooked from the truck and got it leveled front to back then dropped the stabilizer jacks down. It took both of us to get the sewer hoses connected because they we brand new. Then hooked the water up with the water filter and were ready to move the slides out. 

What We Did On Our Camping Trip

While I was getting all the outside stuff done, Jess had made a fire since we were cooking hotdogs for supper. Once the fire was going, she went inside and got the inside of our camper ready then it was time for supper. The kids had a blast roasting hotdogs over an open fire and we finished the night off with some roasted marshmallows then it was off to bed for the kids.

Jess and I sat outside under the stars sitting around our camp fire for another hour or two just enjoying the quiet and the crackle of the fire. With the exception of a couple crackles that crackled a little to loudly and sent a few large embers out and onto Jess’s leg. We finished out the night laying on our new mattress, we had to ditch the one that came with the trailer and get up a better one after the night we spent in the camper at home, her playing on her IPad and me starting this blog post.

Honestly that new mattress was so comfortable, we may end up getting a king size one just like it for our house. We slept so good that night and for the first time in a long time, I actually slept until about 8 am. The kids woke Jess up about an hour before though. After we got up and around it was time to make some breakfast. Time to try out the flat top grill outside to cook the bacon on. I made the bacon outside and Jess made the eggs and toast inside, both turned out great.

After breakfast, the kids went to the playground and played while Jess and I straightened up and organized the under belly storage area. The kids met a new friend while playing and we talked with his mother for a little bit. After they left, we went on a small adventure down to the river that runs along side the campground. There is a nice shoreline and hiking area along side the river where we were able to throw and skip rocks and the kids found a bunch of small shells. 

Next we drove around the camp ground and checked out the bike track, the goat and donkey pastures and we able to pet them, we checked out a teepee and some indian statues and the park store. We bought some souvenirs and some fossil eggs for the kids. The fossil eggs we pretty neat, they were made out of some type of sandy material and shaped into a dinosaur egg. Inside there was a small toy dinosaur. By this time is was past lunch time so we tried to grill up some hamburgers, but the wind was blowing to hard and the flattop wouldn’t get warm enough. We decided to nix our lunch plans and gave the kids something small and easy to snack on and started packing up the camper. 

We had originally planned on staying two nights but between the time we made the reservations and the time that we actually went camping the weather forecast went from the 40’s for lows and 50’s for highs to being 43 for the high and 12 for the low on Thursday. The high is forecasted to be right after sunrise then dropping fast after over the next two to three hours. We really didn’t want to have to pack up everything , drive home and unload everything when it was in the 20’s so we decided to leave a day early.

Dinosaur Valley RV Park

Dinosaur Valley RV Park is a pretty new park. I think it is a little over a year old now. It is owed by one of the people that I used to work with. He built it after he retired as our fire chief. It has come a long way in just a short amount of time. He has a great location! 

The park is directly across the street from DinoWorld, and right next door to Dinosaur Valley 

State Park. If you or your kids are at all interested in dinosaurs, this is the perfect place to go! There is also Fossil Rim Wildlife Park that is only about four miles away. It is a drive thru wild life park. 

There are 80 pull through RV spots that have both 30 and 50 amp service, water and serwer hookups. The RV spots are $49 Sunday – Wednesday and $55 on Thursday – Saturday. If you decide to stay for a week, you will pay for six nights and the 7th one is free. There are also five cabins that sleep up to two adults and three kids. Each cabin is fully furnished and has a queen bed downstairs and two twin beds in the loft. One of the cabins also has a pull out couch. The cabins are $139 Sunday – Wednesday and $159 Thursday – Saturday. There is also a $35 cleaning fee per reservation. 

The park has a family pool and an adult only pool and hottub. There is a bycycle/RC car track, playground, dog park, and event center big enough to hold about 65 people. 

Below is their website and social media pages, go and give them a follow and check out what they got!

Final Thoughts

Overall, everybody had a great time. I’m sure that we will be going there again so we can experience it all and stay longer than just one night, even though we only live about 30 miles away. I highly recommend checking out this camp ground. I would definitely say to plan on staying at least three day though as there is so much to do both at the campground and in the surrounding area. 

Thank you very much for checking out our blog, we will have more posts like this as well as item reviews and tip and tricks. Please follow us here on the blog as well as on our Instagram to get a more behind the scenes and extras look at our adventures. 

Until it is Hitching Time again…

Happy Camping!

NOTE: This post was originally posted earlier this year(2023), when we first started our blog. I am posting all our old posts to get us caught up with the present and then I will starting posting new posts.

Picking Up Our New Camper – Dutchman Kodiak 332BHSL

After months of looking at several different floor plans, brands, layouts, types, and everything else, we finally decided on a trailer. We decided to go with the Dutchman Kodiak 332BHSL. It is a bunkhouse model bumper pull trailer. 

This one worked out best for us because it has a separate room for our kids and each has their own bed. It has a large living area and a hidden pantry that doubles as a washer/dryer area if you would rather have that instead. Being a family of 5, having the storage area that a pantry would provide 

Once we chose the floor plan, the rest of the process went relatively smoothly. We decided on which camper we wanted and went down to the dealership and started the paperwork. We filled out the credit application and then it was time to wait for the banks to come back with an answer.

While we were waiting for them, we looked at some of the options that they were including with the camper. We bought a weight distribution hitch that had built-in sway and leveling bars and a brake controller. They ended up giving us the brake controller and lowering the price of the hitch down to almost half. 

They also included what they called a Premium Startup Package which had 12 different items in it.

It Included:

  • Fresh Water Hose
  • Septic Drain Hose
  • Two wheel chocks
  • RV plug to 110V adaptor
  • Surge protector
  • Fresh Water Filter
  • Water Pressure Regulator
  • Four Pack of RV toilet paper
  • 10-piece Leveling Blocks
  • Black Water Tank Chemicals
  • Hose Saver Angled Fitting
  • Bug Screens for Furnace and Hot Water Heater

By this time, it was well after lunchtime so we decided to run to town and grab some food and goto Walmart for a couple of items that we needed. We made it back to the dealership at about 4 pm and they told us that they had heard back from the banks and that we were approved with no money down. Which from what the sales manager said, is a rare thing even with people that have over 850 credit scores. 

Back to the finance office, we went to sign our life away…I mean sign the loan paperwork. After what seemed like signing our names on 50 different pieces of paper, we were done! Now we just had to wait on the dealership to get the trailer ready so we could take delivery. Unfortunately, that was not something that could be done that same day, so we scheduled it for the following Monday.

The weekend couldn’t go by fast enough and every time that we talked to each other, whether it was in person or on the phone, we would start the conversation with “Hey guess what? We bought a camper!” and do a little happy dance. 

Monday finally came and we were so eager to get our camper that we showed up thirty minutes early for our appointment and had to wait in the parking lot because the dealership wasn’t even open yet. Once the doors were unlocked, our truck doors flew open, and inside we went.

We checked in with the walk-through check-in desk and they took our truck to get the hitch and brake controller put in. They were actually done doing that before we even got to start our walk-through. Honestly, though, that was a good thing, because we had our three kids with us and they could sit in the truck right outside the camper and play on their tablets so we could listen to the walk-through. 

The walk-through took about an hour to do and we recorded the entire thing so we could refer back to it at a later date if we needed to. Starting on the outside she showed us how to operate the propane, turn on the battery, and hook up the water and sewer lines. We looked at the low point drain and the outside gas hookup; The outside kitchen and TV mount and the under belly side-to-side storage bay. 

Then we went inside and it was how to fold down the bed in the back, about all the features in the kitchen, bathroom, and master bedroom. How to operate the fireplace, the tankless water heater, the stove, and the oven, setting the refrigerator, and the hidden plug and phone charger on the countertop. We looked at all the storage, which is a lot for this size trailer really. We were shown to unfold and refold the couches, change the dinette configurations to each of the three setups that it has and how operate the A/C units.

Lastly, it was time to hook it up and go through the process of tearing it down. So I backed my truck up right to the ball thanks to the two-view backup camera on my truck. She walked us through how to attach the trailer to the hitch, attaching the leveling/sway bars, safety chains, and the emergency brake cord. We got the stabilizer jacks up before attaching them to the truck then put the awning and slides in, disconnected the water hose and power cord, and got everything put away into the storage compartment and everything locked up and ready to go.

All we had left to do was pick up our premium starter package kit from their camping store, sign the document saying that we got it and we did the walk-through, the temporary tag was attached to the trailer and we were ready to load up and head for home.

Shortly after leaving was when the “What in the world” moment happened, but that is for the next blog post. So make sure you follow our blog and our Instagram channel for some behind the scenes stuff as well as blog post notifications.

Until next time yall,

Happy Camping!

NOTE: This post is from earlier this year when we first started our blog. I am posting old blog posts to get caught up to the present then I will start posting new ones.

Deciphering RV Model Numbers

Hopefully by the time you are reading this post you have made a decision on what type of RV you want, now let’s go through the different floorplan options. Let me preface this by saying this is no small choice. It took us several months of looking at floorplans to find what we liked. Even after we picked a few floorplans we wanted, it wasn’t until we actually saw the RV in person that we decided to get the Dutchman Kodiak Ultra-lite 332BHSL.

Thankfully most RV dealership websites have pictures of the floorplans and you can sort and filter by certain aspects of the RV. However, I think it is still a good thing to understand what you are looking at at a glance when you are scrolling through the listings so let’s go over what the model numbers mean.

The Number Portion

The first three characters of the model number can be one of two things and both are currently in use as of the writing of this post. One of the options is that the number represents the square foot of the RV. So let’s use the model that we bought, 332BHSL. If 332 was the square foot of the trailer and we do a little math:

Length x Width = Area in square feet

We know the width of an RV is typically 8 feet wide so we would have to adjust the formula to be:

Length = 332 / 8

The answer would be 41.5 feet in length. I can tell you that our camper is 33 feet long so 332 is not the square foot of the RV. 

Typically, according to the research I have done, is that in a fifth-wheel RV, the 332 would be the square footage. However, our RV is a bumper pull so it is different. According to what I have read, typically, in a bumper pull RV, the first two numbers of the model number are the length of the trailer. So for our trailer, the first two are 33 and our trailer is approximately 33 feet long, so that matches.

The third digit in the model number I really couldnt find anything as to what it was for certain. Some sources said it was the year that that floorplan had been manufactured. So in our case it would be the second year. Other sources stated that it was how many slides the RV has. Again it would be correct for us because our RV has two. Maybe it is just something that the manufacture does that isn’t standard across the industry, I don’t really know.

The Letter Portion

Now, on to the letter portion of the model number. The letter portion of the model number is fairly easy to figure out if you know what you are looking for. They are not standard across the industry, but they are typically pretty much the same for most.

Let go through some common ones:

Living Room

RL – Rear Living

FL – Front Living

  • The living room area is located at the front of the RV, closest to the tongue
  • I have seen some really nice fifth-wheel RVs that have a front living floorplan that are very nice.
  • Example: 2023 Forest River Rv Salem Hemisphere 378FL

RE or FE – Rear or Front Entertainment

  • This is basically the same as the Rear/Front Living above, but it may have an upgrade entertainment system. This like a bigger TV or a surround sound system. Things that are normal the typical would have in them.
  • Example: 2023 Cruiser MPG 2780RE

Kitchen

FK – Front Kitchen

RK – Rear Kitchen

  • The kitchen is located on the opposite end from the hitch at the rear of the trailer
  • This is generally found on bumper pull and fifth-wheel RVs
  • Example: 2023 Palomino Puma 30RKQS

OK – Outside Kitchen

  • This is a small kitchen area that is accessible from the outside of the camper
  • This could mean two things.
    • It may be a very small trailer and the only kitchen is located on the outside of the trailer. For example, a tear drop camper has out outside kitchen or
    • The RV will have a normal kitchen inside but also have a condensed version outside. Typically with a small dorm style fridge, sink, griddle or stove and some storage areas. 
  • These are nice to have for those times when you are cooking meat or something that is messy to cook and you don’t want to mess up the kitchen inside to cook it. It is also nice for when it is hot outside so you dont heat up the entire camper cooking.
  • Example: 2022 Ember Rv Overland Micro Series ROK

IK – Island Kitchen

Bedroom

BH – Bunk House

  • Somewhere in the floorplan there is an area that had at least two bunk bed style bed in it. These could be smaller than twins like our bunk beds are or it could be about the size of full beds.
  • The beds could be in their own room or it could be right off the living area with only a curtain for privacy
  • Example: 2023 Dutchmen Rv Kodiak Ultra-Lite 332BHSL

MB – Middle Bunk

BL – Bunk Living

  • Bunk room that has a top bunk bed and a jack knife couch as the bottom bunk. It will have things like a TV, desk, wardrob area in it as well.
  • This one is a guess on my part because it makes sense, at least in my mind
  • Example: 2023 Forest River Rv Salem Hemisphere 369BL

QB – Quad Bunk

TB – Twin Beds

  • Twin bed in the RV
  • This is typically found on the smaller RVs
  • Example: 

Q or QB – Queen Bed

DB – Double Beds

RQ or FQ – Rear or Front Queen

K or KB – King Bed

Bathroom Location

RB – Rear Bathroom

FB – Front Bathroom

Slides

WS or S – Single Slide

SS – Super Slide

DS – Dinette Slide

  • A slide includes the dinette
  • I have seen a lot of floorplans of smaller bumper pull RVs that have just a single slide that moves the dinette out to make more living area.

TS – Triple Slide

  • RV with three slides

Misc

SLX/XLT – Lightweight/Ultra-Lite

W/WE – Western States Edition

  • States like California and others have different RV laws than the rest of the country does. To comply with these laws, some RV manufactures have to make specific changes to their units for compliance reasons.
  • This type is geared more towards motorhomes than towable RVs due to things like emissions laws for example.

There is a lot of model codes out there. Some of them are easy to figure out, others don’t make any sense at all! I saw one trailer that was a tear drop trailer and its model number was 10SS. In other RV the SS means Super Slide but in this instance…

Common sense tells me that when you are determining a model number for an RV, you want to make it where it will highlight the best feature or the most noticeable feature on the unit. Makes sense, right? Maybe if I knew what they stood for, then maybe I would understand why a letter combination was picked.

I hope that this bit of information helped you decipher the RV model numbers you may have been looking at. If it did, please consider following us on our blog, facebook and Instagram.

Until it is Hitching Time again…

Happy Camping

NOTE: This post is was published earlier this year when we first started out blog. I am posting all these blog posts from before prior to posting new content.

What Type of RV to Get?

When you are looking to get a new camper, the first question you need to answer is “What type of RV is the right choice?” Do you want a bumper pull, fifth wheel, Toy Hauler, or motorhome? Should you get a new one or a used one? How many beds do you need? What kind of amenities do you want? There are so many questions that you need to answer before you even start looking for the right floor plan.

DISCLAIMER: The below descriptions are based on what we have seen personally. There may be some floorplans or RVs that we have not seen and therefore we can not speak about it from personal experience. If you have other experiences or opinions, please leave a comment below and let us know.

What Style of RV

Motorhome

A motorhome is going to be the most expensive option because it is basically all-inclusive. With motorhomes, you drive it where you want to camp and everything is self-contained. The main drawback of a motorhome is that you will have to pull a car behind it to have transportation while you are camping. 

Out of all the different types of RVs, the motorhome is the most expensive. They also typically have the highest quality finishes and amenities. The price of a motorhome starts at about $75,000 and can go up over one million dollars or more!

You are limited on the floorplan options that you can have. You are always going to have the living area up front and the sleeping area in the back. The only exception to this is that some motorhomes will have a queen bed that can be lowered above the driver’s seat. There are also some models that have a couple of bunk beds. 

The next question for a motorhome is what class do you want? There are Class C, Class C+, Class B, Class A, and Diesel Pushers. Class C is your smallest option and only requires a class C license to drive it. The class A and Diesel Pushers require a class A license. The standard class A motorhome has gas engines and the Diesel pushers have diesel engines. So then the question becomes how much you want to spend on fuel when you fill it up. 

Class A Motorhomes have a large amount of storage in the form of outside storage bays. There are large bay doors that line both sides of the motorhome. Inside storage really depends on the floor plan.

Fifth Wheel RV

Fifth Wheel RVs are typically larger than bumper pull campers and therefore are heavier. With them being heavier they require a larger pull vehicle. Most can be pulled with a three-quarter-ton truck but are more stable with a one-ton dually truck. This is, of course, my opinion. There are a ton of people that pull fifth-wheel RVs with a single-tire rear end. However, there are a few fifth-wheel RVs that can be pulled with some half-ton trucks. 

For new fifth-wheel RVs, the prices range from about $40k up to several hundred thousand. When we are able to live in an RV full-time, we are leaning towards something like the Forest River Rv Sandpiper Luxury 388BHRD. This model runs about $85k from our local RV dealership and it fits all the needs that we want.

You also have more options with floorplan options with a fifth wheel versus other types of RVs. There are fifth wheels that have living rooms in the back, middle, or front. There are some that have two bedrooms and two full bathrooms. Some have bunk rooms; some have multiple bunk rooms.

Fifth wheels will typically have the most room out of all the choices from what we have seen. They have larger living areas and kitchens making them the best choice if you are planning on living in them full-time and having a bigger family. 

You also have to get a special fifth-wheel hitch installed in the bed of your truck. Because the fifth wheel attaches to the bed of your truck it allows for a heavier load because the tongue weight will be centered over the rear wheels. This makes towing a fifth wheel easier to maneuver in tight spaces. The main drawback to this is that you can’t store anything in the bed of your truck that is taller than the plate of the fifth-wheel hitch. 

The other thing that has to be considered when buying a fifth wheel is how big the bed of your truck is. If it is an eight-foot bed then you don’t have anything really to worry about. If it is a six-and-a-half-foot or less bed then you will have to buy a sliding fifth-wheel hitch, which costs more. This type of hitch allows the connection point to slide back and forth about a foot or so when you turn corners.

Bumper Pull

 A bumper pull trailer is probably the first one that people get a lot of the time, especially if it is just a couple or maybe one kid. They are smaller and lighter than fifth wheels and can normally be pulled easily with a half-ton pickup. 

They range from anywhere from a pop-up tent camper, to a larger bunkhouse camper like we ended up getting, from 2,000 pounds to 10,000 pounds. With heavier ones you may have to get airbags or bigger springs put on your truck but with the smaller ones you shouldn’t have to do anything. 

The price of a bumper pull RV is typically the cheapest option of any of the RV choices that you have. You can get a new bumper pull RV for as little as about $16k and they go up about $60k. The RV that we got was on the higher end of the bumper pull style because it is one of the bigger ones because we have five people in our family. We got the Dutchamn Kodiak Ultra-lite 332BHSL

A bumper pull will typically not have as much room as other types of RVs as they normally don’t have as many slides. If they do have a slide, it is normally in the living area, sometimes there will be a slide in a bedroom. 

Bumper pull trailers also don’t typically have as much storage as other RVs, especially outside storage. Our camper only has one outside storage area that stretches across the front of the camper. Inside there is a fairly decent amount of storage but nothing like a fifth wheel has. However, the point of living in an RV is to pair down on the things that you have to only what you need, right?

Toy Haulers

Toy haulers are a variation of a towable RV. They can be both fifth-wheel and bumper pull styles. A toy hauler is based around a rear garage with a lowerable ramp. The ones that we have seen have a modest living area and kitchen, a front master bedroom with a bathroom, and then a large garage area in the back. Some of them will have a single or double bed system in the garage area that has the ability to be raised and lowered. 

This allows for more sleeping areas when they are lowered and a place to store a four-wheeler, side-by-side, or golf cart when they are raised up. Some toy haulers will have a full-width bed on top and the lower one be a foldable bed that can be converted into a bench for a table. Some floor plans also have a full or half bathroom in the garage area as well.

The other really neat thing about toy haulers is often the back ramp can double as an outdoor patio area. Some of them have a foldable railing that can be folded up so no one falls off the side of it and gets hurt. We saw one toy hauler that had two porches, one off the back of the garage area and one that lowered off the front and could be accessed by a door in the living room.

New or Used?

Now that we have covered the many different types of RVs, let’s talk about whether it is better to go with a new RV or a used one. Obviously, this is a personal question that only you can answer for yourself. Let’s look at some of the reasoning for both sides. 

New RVs

Let’s look at some of the reasons to buy a new one first. When my wife and I were asking ourselves this question, one of the most important reasons is that a new one comes with a warranty. There are going to be enough expenses with buying an RV that we don’t have to worry about making any repairs or fixing any issues right off the bat and being out of that money. 

New RVs will also have the latest and greatest technology. If you are a technology-loving person then having neat “toys” with your new RV will be a big pull for you. On our new camper, we have a Bluetooth connection that will control a bunch of the features of our camper. We can lower the stabilizer jacks, put in or out the slides, control the inside and outside lights, control the water pump, and check the battery and tank levels all from your phone!

Of course, the technology, warranty, and all the newness of the RVs come at a price too. You will pay more for new RVs than you will for older ones. Much like vehicles, an RV starts to depreciate almost as soon as you drive off the lot with it. It doesn’t depreciate as much as a car or truck does but it will drop about 10-15% in the first year and then about 8% for the next four years. After that, it starts to slow down and will not lose as much value every year. How much an RV depreciates also depends on how well your RV is taken care of and any damage that may be done to it.

Used RVs

If you decide to go with a used RV there are some advantages though. Used RVs have been lived in already so any bugs that there might have been had been worked out already. Like if a plug doesn’t work, or the A/C doesn’t work, the person that bought it new, more than likely, has already taken it in and gotten it fixed. There is probably always going to be some kind of issue with any new RV that you buy

Used RVs are typically a lot cheaper than a new one because the first owner is the one that “ate” the depreciation and depending on how old the RV is will determine how much of a lower price you will get. My biggest fear with buying a used one is that there may be a water leak in the roof or something else that might be wrong with it. Of course, this is true with any used item you get, you have to do your own due diligence before you purchase it and accept the fact that there may be some things that you will have to fix once you buy it.

Which is the Best?

So which is the best option to buy? That depends on what you want and how big your family is. Each type of RV has its pros and cons. It also depends on what type of vehicle you have now. If you have a half-to-truck and you don’t want to trade it in also, a bumper pull is your best option. If you have a three-quarters-ton or a one-ton truck, then anything but the motorhome will work for you. If you have a small car then maybe a motorhome is what would work best for you.

If you have a big family, then a small bumper pull will probably be a little tight to live in even if it is nothing more than just sleeping in. If it is just for two people then a small bumper pull would work. They even have little teardrop campers that can be pulled with an SUV.

In the next post, we will be talking about floor plans and things to look for when trying to decide on what RV you will buy, so please follow our blog or follow us on our Facebook or Instagram accounts. On our social media pages, there will be some extra things that you might not see on our blog. 

Until next time,

Happy Camping

NOTE: This post is from our old blog when we started before. I will be posting all our old blog post to get caught up to now.