Hitching Time

Loading

Hitching Time
Medicine - Dealing with sickness

Dealing with Sickness – A Drawback of RV Life

We have been living full time in our RV now for about six months. In that time, we have dealt with changes to our food, clothes, how we live and most recently, dealing with sickness. It is a big change over what we lived in before. We own an almost 2000 sq ft house that sits on almost 14 acres. Our house sits on top of a hill so we can see about 40 miles in almost every direction. It sits about ten feet lower than the highest point in the county which is just to the west of our house.

The Food We Buy

We went from a 2000 sq ft house to a RV that was about 350 sq ft! This presented us with several challenges. We have managed to make it through them all so far. We have had to change a lot of what we do and how we do it. Things like grocery shopping and how much food we kept on hand. We have a good sized pantry in our camper, which was one of the reasons that we bought the RV we have.

In our house, we had a 7 x 13 pantry. We had so much room for food that we would buy for two weeks at a time. Some things that we would get would even be for a month at a time. Honestly though, feeding a family of five, three meals a day, it takes a lot of room when you buy for two weeks at a time.

When we bought our RV, we were still under that mind set, so one of the things that we looked for in a camper was a floor plan with a pantry. After months of searching, we found the Kodiak Ultra-lite 332BHSL. It had a very large pantry, so we could buy food for a week at a time at the very least.

Doing Laundry

Laundry! Now that was a totally different beast. It doesn’t matter what life changes you make, you still have a ton of clothes when you have five people making dirty clothes.

When we first started camping on the weekends, it wasn’t really an issue. We would take like three pairs of clothes, do our camping and then wash while we were at home…no big deal.

Washer/Dryer combo

Once we changed to camping for several weeks at time, the no big deal, became a big deal. First off, we only had clothes storage room for maybe a week and that was pushing it. While we were at home, my wife would typically do a load of laundry every day. Once we were living in our RV for longer, we no longer had that option. Our options were either pay $5 a load every day to do laundry, or go to our house once or twice a week and do several loads of laundry.

Going the first route would amount to about $30 a week in laundry. That route really wasn’t feasible. With the second route, my wife would end up spending all day at our house doing laundry and would be away from the family. While that option was a lot cheaper, it wouldn’t work in the long run. It also didn’t really work with our family dynamic.

We knew that our RV had washer/dryer hookups, but they were located in the pantry that we needed for food storage. So we had to ask ourselves, if buying a washer/dryer combo for our RV was worth the trade off of not having the pantry for food storage anymore. After days of talking about it and exploring other options, we finally came up with a plan.

Was it a perfect plan, not really, but it worked at the time. We bought a washer/dryer combo, and took out our couch to put shelves for our food in its place. At the time, we really didn’t use the couch and honestly, it really wasn’t that comfortable anyway.

Little did we know that we would change our mind again a few months later and have to come up with another plan, but that’s for another blog post.

Dealing with Sickness

These are just two of the challenges that we has faced. They were relatively easy compared to what we have faced the last week, dealing with sickness in a confined space. On New Years Day, one of our friend’s daughter called my wife and said that something was wrong with her mom and asked her to take her to the ER. Being the good friends that we are, my wife jumped into action and took her to the ER without hesitation.

She ended up having the Flu type A. After taking her to the hospital and back home, my wife was exposed. It didn’t matter how many times she washed her hands or the mask she was wearing, she still started to get sick the next morning. Two of our kids followed her down the rabbit hole later that day. Our middle child and myself fought it off until the following day.

For the next four days, we huddled in our camper, rarely seeing the outside world and not being able to hang out with any of our friends. It was one thing when we lived in our old house because we had a lot more room to do things inside and we honestly didn’t have any friends. In the last six months we have made several really good friends and cut our living space down to about a fifth of what it was.

We have only had this happen one of time in since we had our kids where everyone was sick and that was in 2019 when Covid hit and we all got it over Christmas break. However, even that was no where near what this was. None of us really got sick then. This time, however, it hit everyone like a ton of bricks! We went through four bottles of over the counter medicine between the five of us before we could get our kids into see their doctor.

We also picked up a Vicks Sinus Inhaler that worked pretty good on clearing up our sinuses. I highly recommend getting one of these if you suffer from allergies or for when you get a cold. Another thing that we got to try was a bottle of Boost Oxygen.

Medicine - Dealing with sickness

It was not a very fun week!

When we did finally get them in to see their doctor, she prescribed them Tamiflu. Okay, great! Unfortunately, I think all the Tamiflu did was restart their flu because they were getting better but a couple days after they started taking it, they started to get worse again.

Oh the joys of being a parent with sick kids! Am I right?

What kind of the things do you do to help protect your family from getting sick, and when they do get sick, what do you do to combat it?

Time For A Change

For the past eighteen years I have been a 911 emergency dispatcher. Last year, shortly before we started this blog we bought a bumper pull RV and started to go camping a couple nights a month. It only took a couple times for us to realize that we loved it! We had to ask ourselves then, “Is it time for a change?”

Four months later, we purchased a membership to a private RV Resort in the town that I worked. It worked out great! We could stay for three weeks at a time for about $250 a month. That is about the same as two weekends at most RV parks. On top of that, it was only a five minute drive to my work. 

It worked out great for me and my job and my family because there was always something to do at the park. It was a gated RV park so there was that sense of security to allow our kids to roam freely in the park. 

A couple months after we started camping there, I started working there part time as a maintenance person and my wife decided that she wanted to work full time as a security/escort person. This allowed us to live there full time. Again, it was time for a change. Unfortunately, part of that change didn’t stick.

My wife worked there for a couple months until we decided that we didn’t like our kids being back in public school. As good as the school was, we still didn’t like the way our kids were being taught and the way they acted while they were at home, so we decided to take them back out of school and home school them again. That meant that my wife had to quit her job. 

Fast forward a couple months to September. For the past year or so I had been taking three high blood pressure medications and my blood pressure was still constantly running high. I was dispatching almost every night in my sleep and I didn’t like the way that I was acting towards my wife and kids. If this doesn’t scream to you that is was time for change, I don’t know what would.

So, it was time to call it quits and retire from being a dispatcher. From then on, I would work my 28 hours as a maintenance person at the RV park and do another 26 hours or so as a Doordash driver. I quickly found out that I made more money as a Doordash driver than I did as a maintenance person and it was a whole lot easier work. That didn’t deter me though. I enjoyed working with my hands and in the fresh air all day.

My father owned a construction business pretty much all my life. From about 14 years old, I would help him during the summer and after I graduated college on my off days until he retired in 2017. At the time I really didn’t want to do that type of work. I didn’t want to do manual labor my entire life. 

Instead I went to school for computers which was a big waste of money looking back now and then had a long career as a 911 dispatcher. Now here I am some 25 years later back doing what I told myself at the time that I didn’t want to do. Honestly though, I am really enjoying it.

One of the main drawbacks of working in an office setting is that you don’t get the expercise or drink enough water unless you do it intentionally. I found myself getting up to about 315 pounds in 2022. It was the biggest that I had ever been and I hated myself for it.

I slowly made my way back down below 300 pounds, but I could get below about 285 still working as a dispatcher. Once I started working as a maintenance person, the weight just started to drop. I am now down to about 255 pounds and I am still loosing weight.

I quickly came to realize that working 50+ hours a week between two jobs doesn’t leave much time for family. That was one of the reasons that I retired from dispatching. So, it was time for another change. Between loving the campground life, and enjoying working outside and with my hands, I decided to pursue a full time position in the RV park community. It has been a challenge. I have put in probably 50 applications and, so far, had about four interviews. 

RV LIFE Trip Wizard

My first one sounded pretty good on the surface. It was a new park, only about a year and a half old. It had a nice pool and a lazy river and a lounge area with a coffee and regular bar. The only thing that my kids would have to do outside of summer was a very small playground. The money was pretty good and the park looked nice, but we decided at the time that it probably wasn’t a very good place for us to move to then. 

My next interview, I upped my game a little bit and applied to be an assistant park manager at a new Jellystone RV park in Georgia. It would have been a very long way to move, but it would’ve been a great opportunity. I went through the first interview and the person seemed to like me. At the end of the interview, she said that she would be in contact with me the following week for a follow up interview with her boss. That call never came. Another week went by and I got an email saying basically Thanks but No Thanks.

My third interview, I applied for a park manager position. This interview probably went the best out of the three. I spoke with the initial HR person and the interview went well. A few days later I had a phone interview with the VP of Personnel. We spoke for about 45 minutes. At the end of the interview, he said something along the lines of, “I have really enjoyed our conversation and I think you would be a great fit. Unfortunately, we have already offered the job to someone else and are waiting to hear back from him. If he doesn’t take it I will give you a call. We are also in the process of buying three more parks hopefully by the end of the year so once those close I will definitely keep your information on file and give you a call.”

After the interview, we looked at the park online and on the satellite view on google that I interviewed for and I am honestly glad that I didn’t get the job. It had absolutely nothing in the way of amenities other than a building that had showers and a laundromat. It didn’t have a playground or pool or anything that my family could do while I was working. 

The last interview is ongoing. It is for a Maintenance Supervisor position in Amarillo, TX. I did the initial interview the week before Christmas, after three hiccups with scheduling issues. She said that she thought I would be perfect for the job and she would contact the manager there and set up an interview with them. Being that it was a few days before Christmas, it took about a week to hear back from her, but I finally did and now I have an in-person interview scheduled for the 8th of January. 

So….

Road Trip

We have looked at this park online and the area. Looked at the reviews of both the park and the company. Everything points to it being a nice park with lots of things to do. I think the only thing that is going to be somewhat of a shell shock to us is the temperature difference. My kids have never really seen snow before, and we really don’t get temperatures below about 25 very often where we live now. If I get this job, we are going to be moving at the beginning of winter so it is going to be a massive change for us. 

We will survive though and hopefully we will all love the park and the company. They have several parks throughout the US, so if we ever want to go somewhere else, it should be relatively easy to just move to a different park if a position opens up there. 

We will see…

I will post again after our trip there for the interview about how it went so make sure that you check back in a couple weeks. Also, check out our TikTok and YouTube pages for some videos about our trip while we are there. Just search for Hitching Time on both platforms.

Until next time y’all,

Happy Camping.

RV Safety Tips – Staying Secure On The Road

RVing is a dream come true for many adventurers and travelers. The freedom to explore new places, set your own pace, and have your home on wheels is a unique and fulfilling experience. However, with this freedom comes a responsibility to ensure your safety on the road. Whether you’re a full-time RVer or just hitting the road for a weekend getaway, RV safety should always be a top priority. In this comprehensive guide, we’ll explore a wide range of RV safety tips to help you stay secure on your journey.

1. Regular Maintenance is Key

The foundation of RV safety lies in ensuring that your vehicle is in top working condition. Regular maintenance checks are vital to avoid breakdowns, accidents, or costly repairs. Before hitting the road, make it a routine to inspect the following:

  • Tires: Check tire pressure and look for signs of wear or damage. Make sure the tires are properly inflated to prevent blowouts. You can go one extra step and get a Lippert Tire Pressure Monitoring System to constantly know what your tire pressure is at.
  • Brakes: Ensure your brakes are in excellent working condition. Brake problems can lead to accidents and should be addressed immediately.
  • Lights: All lights, including headlights, taillights, and turn signals, should be in working order to keep you visible on the road.
  • Engine: Regularly service and maintain your RV’s engine to prevent unexpected breakdowns.

Having a checklist for these maintenance tasks can help you stay organized and ensure that everything is in working order before each trip.

2. Know Your RV’s Weight Limits

Overloading your RV can lead to a host of safety issues, including difficulty in handling and braking. It’s essential to know your RV’s weight limits and distribute your belongings and passengers accordingly. Here’s what you should do:

  • Check the manufacturer’s specifications for weight limits, which should be clearly marked on your RV.
  • Weigh your RV to ensure it’s within the recommended limits. Truck stops and public scales often have scales available for this purpose. CAT scales can be found at a lot of the major truck stops across America. You can download their app( iOS / Android ) and weight your RV from the comfort of your vehicle. You can even pay for it on the app!
  • Distribute your cargo evenly to maintain balance and stability while driving.

3. Defensive Driving Matters

Driving an RV is a different experience compared to driving a regular passenger vehicle. Being a defensive driver is crucial for RV safety. Here are some defensive driving tips:

  • Maintain a safe following distance from the vehicle in front of you, as RVs have longer stopping distances.
  • Anticipate turns and stops to avoid sudden braking or acceleration.
  • Be cautious while changing lanes and always use your turn signals.
  • Be aware of your RV’s larger blind spots and use your mirrors effectively. Consider installing blind-spot monitoring systems for added safety.

4. Fire Safety Preparedness

RV fires can be devastating, and it’s essential to be prepared for such emergencies. To enhance fire safety in your RV:

  • Install smoke detectors and test them regularly to ensure they are in working order.
  • Have fire extinguishers readily accessible, and ensure that everyone on board knows how to use them.
  • Develop an escape plan in case of a fire and practice it with your family or travel companions.

5. Secure Your Belongings

While on the road, your belongings can shift, fall, or even become projectiles during sudden stops or turns. To prevent accidents and maintain an organized living space, use the following tips:

6. Safe Parking and Campsite Selection

Choosing where to park your RV or camp can significantly impact your safety. Opt for well-lit, well-maintained RV parks and campgrounds that have good reviews and a strong reputation for safety. If you’re boondocking or parking overnight in a rest area or Walmart parking lot, choose well-traveled spots where other RVers are present. Trust your instincts; if a location doesn’t feel safe, it’s best to move on to the next.

7. Lock It Up

An RV is essentially a home on wheels, and just like any home, it needs to be secured. Always lock your RV when you’re away, even if it’s just for a few minutes. Install deadbolt locks on the entrance door for added security. Don’t forget to lock the storage compartments, too. It’s also a good idea to have a security system in place, which can deter potential thieves and provide peace of mind.

8. Emergency Kit Preparation

Having a well-stocked emergency kit can be a lifesaver in various situations. Here’s what your RV emergency kit should include:

  • First-aid supplies: Stock a comprehensive first-aid kit with bandages, antiseptics, pain relievers, and any necessary prescription medications.
  • Flashlights: Have multiple flashlights with extra batteries for nighttime emergencies.
  • Multi-tool: A multi-tool can help you make small repairs or adjustments on the road.
  • Jumper cables: In case of a dead battery, jumper cables or a jumper box can get you back on the road.
  • Spare tire: Make sure your RV has a spare tire and the necessary tools to change it if needed.

It’s important not only to have these items but also to know how to use them effectively. Regularly check your emergency kit to ensure that all supplies are in good condition and replace anything that has expired.

9. Stay Informed About Weather Conditions

Weather can have a significant impact on your RV travels. Before you hit the road, check weather reports for your route and destination. Staying informed about the weather can help you plan your trips more safely. In the event of severe weather conditions, be prepared to alter your plans and stay in a secure location until it’s safe to resume your journey.

10. Socialize and Build a Network

One of the beautiful aspects of RVing is the strong sense of community among travelers. Get to know your neighbors at campgrounds and RV parks, and attend group activities if available. Building relationships with fellow RVers can provide you with a support system on the road. They can offer advice, help in emergencies, and alert you to potential issues in the area you’re traveling through.

11. Carry Safety Documentation

Always have essential safety documentation on hand. This documentation should include:

  • Copies of your RV’s registration and insurance. Make sure your insurance is up to date and provides adequate coverage for your travels.
  • A list of emergency contacts, including family members, friends, and any fellow travelers or RVing friends you’ve met on the road. You can download an Emergency Contacts form that we made by clicking here.

Keep this information in a secure location, such as a dedicated folder or a safe, and consider having digital copies saved on your phone or a cloud storage service for easy access.

12. Regular Safety Meetings

If you’re traveling with family or friends, conducting regular safety meetings is essential. Review procedures for various emergency situations, such as fire, medical emergencies, or severe weather, to ensure that everyone knows what to do. Being well-prepared as a team can make all the difference in the event of an emergency.

In the world of RV living, safety should always be a top priority. By following these RV safety tips, you can enjoy the freedom of the open road with confidence and peace of mind. Whether you’re a seasoned RVer or new to the lifestyle, a secure and enjoyable journey is within your reach. Remember that while these tips can significantly enhance your RV safety, unforeseen circumstances can always arise. Staying vigilant, adaptable, and prepared is the key to enjoying your RV adventures to the fullest while staying secure on the road.

The “I Don’t Want To Go Home!” Blues

About a year and a half ago, we started talking about getting a camper and going camping. At the time, it was early in the planning phase of our life plan. We started looking at floor plans online and talking between the two of us. We also started talking to our kids to get their feelings on the matter. Two of the three of our kids were very excited to do it with us. Our middle child was a totally different story though.

She was very adamant about not wanting to go because she didn’t like bugs and the house that we live in was full of memories that she didn’t want to lose. At the time we were only talking about going for a weekend or two a month, but she still didn’t want to have anything to do with it. It wasn’t until later that we started talking about living full time in an RV. When that dream started though, her devotion to staying in our home intensified.

When we got our camper and went camping for the first time though, she changed her tune and all of them started on the “I don’t wanna go homes.”   The kids absolutely love being in the camper, they even wanted to stay in the camper when we got home. Even our middle child totally changed her tune and now wants to live in our camper full time. So, I guess, when you start loving your camper more than your home, it’s time to hitch up and hit the road full time.

How to combat the “I don’t want to go homes.”

Plan your next stay

Before we bought our membership in a local private campground, we were limited financially, to about one weekend a month. This gave us two weekends a month to choose from because of my husband’s work schedule. While we were camping we looked around at other campgrounds to stay at or if we liked the park we were in and wanted to stay there again, we would make a reservation for our next month’s outing. 

Since now we have a membership into a local campground, and our children love it there, we have a little more flexibility into when we can go and how long we can stay. The campground we bought into is close to my husband’s work, so he can work while we are camping. We can also stay up to three weeks at a time for the same price as we could stay somewhere else for a few days. This gives us more freedom on when we can go camping.

Whether you are just a weekend warrior or a full time RVer, make reservations for your next location as soon as possible. This allows you to have a better selection on where to go, when to go and some parks even let you choose which spot you would like. 

Having your next reservation made before you leave gives you the opportunity to tell your kids when you are getting ready to go home when their next adventure will be. This helps some with the “I don’t want to go homes”. 

Research New Places

If you do not work remotely and can’t just travel wherever, you are probably going to be limited to the distance from home you can travel when you are going on a camping weekend without taking a day off of work. Luckily, for us, my husband works 12 hour shifts. This gives him a three day weekend every other week so it gives us some extra time to travel and stay. However, if you still have a Monday through Friday 8-5 job, you will be limited to travel distance and time. However, maybe on your camping weekend you can take an extra day off or only work half a day on your Friday.

Keeping this in mind, look for new campgrounds within your driving distance area that you can stay at. Some places will have more options than others, some areas may only have a few. However many you do have, check them out online while you are camping. Look at what amenities they offer, what is going on in the area when you plan on camping next. Maybe there is a carnival scheduled for a certain weekend that you can camp on and that can be a day outing. Maybe the campground has a chili cookoff and you want to go then to enter your chili or partake in what others make in the cookoff. 

Just remember, camping is fun, so do your best to make it even more so.

Don’t Think About It

The last thing that you want to do when it is getting close to time to go home from a camping trip is to dwell on that fact. No matter how badly you might not want to leave, there will come a time when you don’t have a choice. Some campgrounds will let you stay as long as you want, charging you a monthly rent. Others may not give the option to stay more than a month at a time, or maybe even less than that. 

When we signed up for the private resort membership where we stay at, at the very most you can stay for is three weeks at a time at no cost (other than the cost of the membership). However, you can do a week buyout and stay for seven weeks, but then you have to leave for at least a week. 

At another local campground, they do not offer monthly rentals for anything more than a few months, and then it is only under special circumstances. Even then there isn’t anymore of a discount than he gives for a week (buy 6 nights, get one free). 

One way or another, there is going to come a time when it will be time to leave. When that time comes, it is best to try and keep your kids, and you, thinking about the positives. Maybe you will come back soon? Maybe you will be going to a different campground? Whatever you have to do to keep leaving off your mind and keep it on the fun you’re having and the memories you are making. 

Capture Your Memories

The main reason that our middle child gave when asked why she didn’t want to live in a camper and sell our house was because of the memories that she has had there. I think this is also one of the driving factors for not wanting to go home when we go camping. 

So while you are camping there, capture your memories of your time spent. Take pictures, make crafts, do videos, etc. With everything going digital now and most people always having a good quality camera in their pocket, taking pictures is one of the easiest ways to capture those memories.

Digital Storage

With those pictures, there are several things that you can do with them from there. You can simply dump them onto your computer or onto a flash drive to save them. If you have an IPhone, you can get a flash drive, like this one, that has a lightning connector on one end and a regular USB on the other. You can plug this flash drive directly into your phone and download the pictures to it. You can also get USB drives with USB-C connections for newer android phones or tablets. 

You could also upload your photos to an online drive like Google Drive, Dropbox, or Microsoft Onedrive. Each of them have free accounts that allow you to upload between two and five gigabytes of storage. Anything over that you will have to pay for extra storage. The good thing about these are that all your pictures will be stored in a secure server that can be accessed from anywhere.

Another option that you can use, is your own personal cloud drive, like this one. We use one of these for our pictures. It is hooked into our home network and we have an app on our phone that once we open it, it will automatically start uploading any new pictures to that drive. As long as our home network is up, it can be accessed from anywhere.

Photo Books

If something physical is more your speed, I recently found out about a website that you can make photo books on. There are several options that you can choose from to have either a one off photo book, or one that is automatically made and sent to you at a regular interval. You can make photo books from your phone or even connect your account to an instagram or Facebook account. If you do this, you just have to post your pictures to one of them and once it reaches 60 pages worth of pictures, it will automatically print the book and send it to you. You can choose several different styles of books as well as pages. You can edit the book before it prints to exclude certain pictures as well. They also have what they call a baby guarantee, where they will reprint it for free if your photo book “gets too much baby love”.

Scrap Books

If you are an old fashioned kind of person or one that just likes crafting, maybe your best option is to make scrapbooks of your adventures. Scrapbooks allow you to actually keep those projects that your kids made while camping, that special flower that your honey picked for you or that a leaf rub that you kids made for you. 

The scrapbook route allows you to keep the actual thing that was made instead of just a picture of it. However, scrapbooks tend to be a lot bigger and take up more room if you live in your RV full time.

What About Your Family?

Does your family ever get the I Don’t Want To Go Homes? I’m sure that most people will get this at one point or another in their lives. What do you do to combat the I don’t want to go homes? Leave a comment below and let us know.

Thank you for taking the time out of your day to read this post. Please subscribe to our email list to get emails when we publish a new update on our adventures. We hate spam as much as you do, so we promise to never sell or otherwise distribute your contact information with anyone! To sign up, simply fill out the form below. Once you click submit, check your email and you will need to verify that you were the one to sign up for our email list.

We would hate it, but, at any time, if you do not wish to receive emails from us for whatever reason, there is a link at the bottom of every email that will unsubscribe you from our email list.

Subscribe

* indicates required

Until its time to hitch up the camper again,

Happy Camping!

No Camper Blues

Have you ever had the no camper blues? Let me tell you, it stinks! We have been without a camper now for two weeks. In March, we spent almost three weeks in it and our whole family absolutely loved it. Our ultimate goal is to move into it full time and sell our home. We thought that we would be living in it already and have our house sold, but those plans took an unforeseen turn.

As you may have read in an earlier post, we purchased a membership to a local private RV park near where I work, called Tres Rios RV Resort. That membership allows us to stay there at no cost for up to three weeks! This is going to come in very handy over the summer at the very least. 

We plan on staying there for the max that we can according to my work schedule and then spend a week at home. This will allow us to enjoy our time in our camper doing what we want to do and it will allow our kids to enjoy all the things that Tres Rios has to offer. 

The icing on the cake of this is that we have about 40 solar panels on our home and can produce and send back to our electric company 50+ kilowatts per day on days that we are home. Since we won’t be home and won’t be using any power to speak of, we are going to be sending back even more. All the power that we produce gets banked for later usage until the first of the year, when the power company will send us a check for it!

We Have The Blues

Over the past five months or so that we have had our camper, we have gone camping several times. Most of those times were just for a few days, with the last time being several weeks. Every time that it is time to pack up and leave our kids get super cranky and depressed. They constantly say that they don’t want to leave. We no more than pull into the driveway most of the time and they start acting totally opposite of how they acted during the camping trip. 

I’m sure that it has something to do with the fact that there is less stuff to do at home. They can’t ride their bikes any more than in our driveway. There aren’t any activities to do. All this takes its toll on them.

Honestly, it takes a toll on us as well. We have pretty well stripped our house to bare minimum when we had our house up for sale and basically live in about a third of the entire house while we are there. This makes it where the stuff that is required of us in the house, like cleaning, is at a bare minimum. While we are home, my wife and I have this sense that we should be doing something while we are there and oftentimes at the end of the day we feel like we didn’t get anything done. Even though there really isn’t anything to get done.

What’s Wrong With Our Camper

The second camping trip that we took, we noticed that we had water leaking behind the toilet. I checked it out, because I am somewhat of a handy guy. If it was something easy, I could probably fix that. I looked at the connection and thought that maybe the leak was where the water line connected to the back of the toilet. So I tried to take the hose off and put some teflon tape on the connection and see if that fixed it. 

Unfortunately, it did not fix it and upon further examination, I realized that it was coming from the top of the connection, not the thread side. Being that we had wanted to spend as much time as possible in our camper now, we decided to install a shut off valve inline with the supply hose and just keep it off until we needed to flush the toilet. 

When we were packing up to go home after our next camping trip, I noticed that the black tank valve would not shut. After messing with it for a while, I accidentally bent the shut off cable which made it worse. Later while using a plumbing snake to make sure the tank was empty, we located a rather large piece of flooring styrofoam logged in the pipe where the gate shuts.

A couple days after we got home, we had a pretty significant rain storm and noticed that there was water all over our kitchen counter and down on the floor. Guess what, there was a leak in the window seal!

For this being a brand new trailer, that was literally only built four months prior to us purchasing it, it sure has more than its share of problems. The last problem reared its ugly head on our last camping trip. The last one was the first time that it had been warm enough that we had to fire up the second air conditioner in the trailer. When we came inside for the evening and were getting ready for bed, we found out that our bed was wet and it was coming from the A/C unit above it!

That did it for us, it was time to take it in for fixing and hope that the repairs wouldn’t take too long. We were in for a surprise…

Time To Take It In

While we were still on our last camping trip, we called and made an appointment to bring our camper in to get fixed. When we made the appointment, we learned that the appointment was only for a repair needed diagnosis. Once a technician looked at our camper, they would then have to turn it into the warrant department and wait on a response from them. While they were waiting our camper would be taken out of the shop and stored outside. 

We were told that if they had to order parts for whatever was wrong it could take four to six weeks to get the parts in. They did say if they had to order parts that we could come and get our camper if it was in safe working order, then we could bring it back after parts arrived and they would put the camper in the queue to be fixed. 

They couldn’t tell us how long that would take though. So there was a potential that we could be without our camper for two or more months! That was not what we wanted to hear. This is prime camping time!

Status of Our Camper

We dropped our camper off on April 4, 2023 and were told at drop off that it would be three to six days before it would be looked at. That was more than what I wanted to hear, but the dealership we bought it from is the #1 selling towable dealership in the nation, so they are pretty busy. Nothing could be done about the time frame so it was something we just had to accept.

The following Tuesday, we still had not received a call saying that they checked it out yet, so we gave them a call. We were told then that they were running behind and they were closed on Friday and Saturday for Easter and that it would hopefully be looked at by the end of the week or the beginning of the next.

By the two week mark, we still had not heard anything on the status of it and honestly I was getting a little upset. I tried to call in and talk with the person that was our contact, but she did not answer so I had to leave a message. A couple hours later, I still had not heard back from her so I called again. This time they told me that she was not there that day and sent me to someone else to try and answer my questions.

When someone finally came on the line, she said that they did get it in and was able to determine what was wrong with it. This is what we were told:

  1. The handle on the black tank was bent. Nothing was said about the chunk of styrofoam that we saw inside.
  2. The flush system on the back of the toilet was leaking and would have to be replaced
  3. The seal around the kitchen window has some holes in it and would have to be patched
  4. Some of the hoses in the a/c unit were not sealed where the connections were and was causing the cooled air to be mixed with the outside air causing the condensation

Basically all the stuff that I figured that it was, but unfortunately unable to repair myself. I guess I am going to have to start learning so this doesn’t happen again.

That was yesterday. Today I got a call from our actual rep which basically said the same thing. However he did add that our camper had a recall on it. One that had to do with electronic stabilizer jacks. She said that the back of the switches are not water tight and there is a possibility that while we are driving down the road the jacks could start extending on their own. 

WOW!

Just that part of it could be three to four weeks to get replaced. Hopefully they can fix the other stuff now and can take it back when the new switches come in, if it is going to take that long.

So now we wait…

We wait on them to hear back from the warrant department. We wait for any parts to come in that they have to order. Then we wait for them to get back to our camper to get it fixed. Then more than likely, when they call to come and pick it up we wait until my day off to go and get it.

Thank you for taking the time out of your day to read this post. Please subscribe to our email list to get an email when we publish a new update on our adventures. We hate spam as much as you do, so we promise to never sell or otherwise distribute your contact information with anyone! To sign up, simply fill out the form below. Once you click submit, check your email and you will need to verify that you were the one to sign up for our email list.

We would hate it, but, at any time, if you do not wish to receive emails from us for whatever reason, there is a link at the bottom of every email that will unsubscribe you from our email list.

Subscribe

* indicates required

Until it’s time to hitch up the camper again,

Happy Camping!

NOTE: This is an old post from when earlier this year(2023) when we first starting our blog. I am posting old blog post first to get caught up the present then I will start posting new ones.

Tres Rios RV Resort – Campground Review

A couple of months ago we signed up for a free weekend at another campground in the Glen Rose area campground called Tres Rios RV Resort. We were initially scheduled to camp in February but due to weather conditions, we postponed it until this weekend.  

Tres Rios RV Resort is a private campground. Meaning that it is not open to the public. Why is this important you may ask? Think of this for a minute. Since 2019, first time RV owners have skyrocketed. There were nearly four million more RV owners between 2019 and 2020 alone! As the number of RV owners grows, the availability for RV spots decreases. In that same time frame there was only a 1.7% increase in RV parks. That means there are a bunch of new families looking to camp and only a very slight increase in place for them to camp.

To break that down even more, of the 15,462 campgrounds in the US as of 2022, approximately half of those are available to the public. Making the available spots for the 86 million households that own a camper to camp in even smaller. 

On top of all of that, spot rent for campgrounds have about doubled in the past five years. Spots that averaged about $30-35 a night, now are about $60-70 a night. There are some campgrounds that are booked out for over a year! 

The Park

Tres Rios is located just outside of Glen Rose, TX, the “dinosaur capital of the world”! It sits on 47 acres where the Brazos, Paluxy Rivers and Squaw Creek come together. It is actually where it got its name from. Tres Rios means Three Rivers. 

RV Spots and Rentals

The park has 238 RV spots, 19 cabins, and 5 cottages. All RV spots have full hook ups and 90% of which have 30 and 50 amp service. The RV spot that we stayed in was approximately 25×70, which appears to be about what most of the spots are. Some are smaller, some are a little bigger. The spots are also perpendicular to the roads, making it a little hard to park compared to ones that are slanted, but not by much. A large majority of them are pull through sites as well.

Playground

Along with the large number of RV spots and cabins, there are a ton of things to do to keep you and/or your kids busy while you are camping there. They have a fairly decent playground that has two playground areas with a slide, climbing wall and several swings. There are also several climbing tires that are buried in the ground and a large tractor tire that has been painted and made into a large sand pit.

 I spoke with our point of contact this weekend and she said that there is a new playground that is scheduled to be installed this year, around summer time, that is going to be a lot better. It will be a large playground system with several slides, swings and other playground items, and the best part is that it will all be covered. 

I wonder what else is planned this year…

Pool

There is a pool located at the back of that park. It isn’t the biggest pool I’ve seen at campgrounds but it is there to swim in. It was built in 1919 by the YWCA. At the time it was the first and the largest inground pool built in Texas. At the time of this post, it is closed so I was not able to go into the fenced area of the pool but from the looks of it, it is about 30’x60’. It ranges in depth from 3’ at one end to 8’ deep where the drain is and the back to 6’ at the far end. At the shallow end of the pool, there is a covered area where parents can sit and watch their kids in the pool. It also serves as an area for a screen for pool time movies! The pool is open from April until October(?)

Yard Games

At the back end of the park, there is a large circle driveway where all the activity area is. In the middle of the circle drive is a volleyball net, tether ball, and several horseshoe pits. It is also the area where they have cornhole tournaments and other yard game events.

Activities at the Park

One of the things that I love about Tres Rios over some of the other parks that we have stayed at, Granted it is only a couple that we have stayed at so far, is that they have planned activities everyday! There is an organized kids activity Wednesday through Sunday at 9am, cards/games everyday at 2pm, Bingo every Friday, cornhole tournaments on Thursdays and the list just goes on and on! You can check out their activities calendar on their website.

On Site Restaurant

During the middle of the year, there is an on site restaurant that serves breakfast on the weekends. We have not had the chance to try this out because it wasn’t open yet at the time of this post, but we will give it a shot when it does open. The building, however, is a very nice building. There is seating for about 75 people or so. The decor inside is an industrial rustic vibe. Stone walls with an open rounded roof which is bare to the inside and hardwood floors. The air conditioning ducts are exposed giving the industrial feel to it.  

The Cost

Tres Rios is one of nine properties owned by Ocean Canyon Properties. All of which are included in your membership. You can goto the Tres Rios website and fill out the form on the page or call the number listed and get a free 3 day, 2 night stay. The only “catch” to it is that you have to attend a sales appointment which lasts anywhere from 90 to 120 minutes. In this meeting they will show you the park, show you all the other parks that are in the network, and the benefits of having a membership. 

A couple days before we went on our free weekend, we looked at the reviews of the park on several different websites. These reviews ranged anywhere from six months to 10 years old. A bunch of the reviews stated that their sales person was very pressuring and that when they turned down the membership they were rude to them the rest of the weekend. We honestly had second thoughts about going just by reading the reviews. 

I am very glad that we did though! 

Our sales meeting lasted about two hours, mainly because my wife and I took a little time to talk after the sales pitch was over. Our sales person was not pushy at all. She was very friendly and was very upfront with us from the very beginning of the meeting that the highest pressure that was going to be put forth is that the offer for the premium membership that included all the parks in the network would expire once the sales meeting was completed. After that, the only option we would be able to get would be for just Tres Rios alone.

When we first heard the total price that the membership cost, we were shocked. However, that shock didn’t last long. They do in house financing for seven years. This makes your monthly payment down to a price that is affordable. I’m not going to put what our price was because your price may be different than mine because of discounts and how much we put down, etc. I will say that the price per month that we are paying is less than a weekly price at many of the other campgrounds that we have looked at! At the average price of daily campsites, it would only take 5 days to more than cover the monthly payment.

Our Plans

One of the limitations that we had prior to getting this membership was having to budget and save for a month to pay for the campsite when we wanted to go camping. This limited us to only about one weekend a month that we could go because it would cost us about $150-180 for a three day weekend camping trip in just the site alone.

With this membership, we can stay at Tres Rios for up to three weeks at a time. Another bonus to this is that it is only about five minutes from my work. Will we jump right in staying three weeks at a time right now, no, but the option is there. This option will be especially good during the summer when the pool is open. For now, we will shoot for a week or two a month and work up there. 

Once we decide to go full time RVing, Tres Rios will be perfect for us since it is so close to my work and with my schedule, I would only have a long commute about two days a month. We are so ready to take this step and hopefully, one day soon, our dream will come true.

Final Thoughts

We were very skeptical before we went after reading all the reviews we did, but I am so glad that we decided to go. I told my wife, worst case scenario, we get a free weekend and have to waste two hours listening to someone talk and we get a blog post to write. I am glad that I was wrong, and that all the reviews we read were either outdated or incorrect.

Would we recommend going to Tres Rios and getting a membership? Absolutely! The gains of the membership is worth so much more than the price tag that is required. 

Until new time…

Happy Camping

NOTE: This post was posted earlier this year(2023) when we first started our blog. I am posting old post first to get caught up to the present and then I will start putting up new posts.

Problems With Our Camper

For the last couple weeks, we have been camping at Tres Rios RV Resort in Glen Rose, TX. A review of it will be out later this week, so make sure you follow us on social media and here on our blog to see when that comes out! Anyway, We had an absolute blast while we were there, and none of us wanted to go home. Unfortunately, we did have a choice because we had to get our camper worked on and when we got home I found out I have a problems with my airbags as well!

After we got home, I noticed that my airbags would go off about every 30 seconds or so. That told me that I probably had a leak. So I aired up my airbags to about 40 PSI and went to both sides of my truck to see if I could hear anything.

I watched my app for it when I was airing it up and saw that it showed the current PSI as it was airing the bags up. So I sat and watched it for a minute. It would air that airbags up to 40 PSI and turn off. When it turned back on it showed that it was at 30 PSI! That told me that I definitely had a leak! I was loosing 10 PSI every thirty seconds or so.

I was sitting on the passenger side of my truck while I was doing this so I checked it first. I got down as close to them as possible and listened. I didn’t hear anything. So I went around to the other side. I waited for the compressor to air them back up and shut off and listened again. This time I hear a hissing sound!

Down on my hands and knees I went. I looked at the airbags hoping to see something but I didn’t I figured I’d probably have to get some soap solution to find it so I started to get up. That’s when I noticed this…

Well, I didn’t have a leak. I had a full break! Well more of a melting of the air line. The air line was melted against the exhaust! Why the air line wasn’t tied to something to keep it away, I don’t know.

Camper Problems

The reason that we had to come home in the first place was because we were having some issues with our camper and had to take it in for service. Our black tank valve would not close, our toilet wouldn’t stop leaking and one of the A/C units would freeze up on us.

We made the appointment with the dealer that we bought it from and they advised us that once we brought it in for the initial appointment, it would take about a week for our RV to be looked at. After that they would have to send the diagnosis into the warranty place and see what was covered and order parts if needed. That could take up to 4-6 weeks to get the parts in and then the time it took to install them! We really didnt want to be without a camper for two months, so we tried to call a Mobile RV repair person that worked with out warranty.

We called about six different people and most of them all told us that they don’t work on black tank issues! We finally found one that said he did, but he charged $150 an hour for it! Hoping that it would be just replacing the black tank gate and it should take more than an hour to do, we decided to have him come and look at it before we took it to the dealership.

While waiting on him to get there, we looked at the issues and tried to see if we could fix it ourselves.

First off the Toilet

On the back of the toilet, there is a supply hose that goes from that water intake line to the back of the toilet. I disconnected it from the back of the toilet and put some teflon tape on the treads and put it back on. I ran our water hose to the RV and gave it a shot. I flushed it several times and didn’t see a leak. Awesome, maybe I fixed it. I let it sit for a few minutes and then came back to see that there was water on the floor behind the toilet!

I got down and watched it for a while.

Drip…Drip…Drip…

Yep it was still leaking. I felt around and tried to see where it was coming from. Unfortunately it was coming from the connection where the hose screwed into, but on the top side. That meant that the entire back assembly would have to be replaced. Something that I had no idea on how to do

Black Tank Issue

The valve handle for the black tank was stuck in the out position and it would not go in.

Our RV is equipped with a black tank flush out, so we ran it for a while to make sure there wasn’t anything inside. Then we ran a water hose up the outlet pipe and got a bunch of stuff out of it. Thankfully we had something to catch all the stuff coming out. We tried that valve again. I got it move out some but it wouldn’t go in any more. So we tried the hose again.

We worked on it for about an hour and never could get it to close. So we tried sending our camera snake up the outlet and see if we could see anything. What we found surprised us, but also to our surprise, both the mobile RV tech and the intake person at the dealership said it didnt surprise them.

Yep, that is a chunk of insulation from the floor sitting at the gate of our black tank. No wonder it wouldn’t close!

Camper Dropped off

The next morning, I took the RV to the dealership and got it dropped off and went to the place that I got the airbags installed to talk to them. I was all ready to cause a big stink about how they should’ve secured the lines. I didn’t get to cause that stink though because when I showed the service guy the picture, he said, “Oh my goodness, those lines should’ve been secure so that wouldn’t happen, do you have about 15 minutes to wait and we can get that fixed for you?”

So here I sit, writing this blog post while I wait for them to get done with my truck. Sure enough, 15 minutes later, they pulled up with my truck all fixed. Actually it is better than it was before. When they first installed them, I had to keep them at 10 PSI for the compressor not to run every 10-20 minutes, instead of the 5 PSI that is the minimum. So far, I have driven to another store about 20 minutes away to get some other things, and I have not heard the compressor kick on once.

Now We Wait!

Now that my truck is fixed, and the RV is dropped off, now we wait to hear back from the service department on how long it will take to get our RV fixed before we can go camping again. I hope it doesn’t take to long and we can make it to our next scheduled trip.

I will post again when we know more, so until then…

Happy Camping!

NOTE: This post was originally posted the first part of this year(2023) when we first started our blog. I am posting old blog posts to get us caught up with the present and then I will start posting new ones.

10 Things To Do To Get Ready To Go Camping

If you are like we are right now, and are just weekend warriors, there are several things that you need to do every time you get ready to go camping. Let’s go over 10 things that we do to get ready to go camping.

NOTE: Some of the links on this page are affiliate links. Affiliate links, do not affect the price you pay, but will give us a “referral fee” to help with the expenses. 

1 – Figure out where you are going and make reservations

We try to go camping about once a month, more if we are able. With the way that I work, I have a three-day weekend every other weekend so it works out great. One weekend we will go camping, the other weekend that I’m off, we work around the house. Hopefully, we end up choosing the right weekend so that the weather cooperates with us.

The first thing that you have to do when you decide it’s time to get away is to find a place to go and make a reservation. Being that we only have three days without me having to take days off of work, we try to find somewhere that we can get to within five to six hours. Most of the time, camp grounds will have check in times around 2-3pm. That gives us time to get up, eat breakfast and leave by 8am to get there around check in time. 

If you don’t have a campground that you like going to a lot or are like us and like to try different campgrounds very times, there are several ways of finding a campground to goto. Check out our post about Finding Campgrounds to Goto for more information.

2 – Make a menu of what you are going to eat

I know what you might be thinking. You are going camping to relax and not have to worry about what you are going to cook when, or something like that. If it is just two people, then meals aren’t probably that big of a deal. However, if you have kids or a big family, then it is going to be a little more important.

Once you know how many days you are going to be camping for, you will know how many meals you should plan out. We tend to do things a little backwards when we camp. At home, we try to keep breakfast and lunch as an easy meal and then something more filling for supper. When we are camping though, we try to do things we don’t normally do and have a nice hardy breakfast, an easy lunch and then something that our kids can help with or do themselves for supper.

Once you have your meals planned out, make up a grocery list for it and go shopping a day or two before. If you do it shortly before you go camping, you are less likely to use the things that you bought for camping on other meals. Which brings us to our next tip…

3 – Turn on the refrigerator the day before

Don’t ever put cold food into your refrigerator if you just turned it on. It can take a good four to six hours for your refrigerator to get cold. Once it is cooled down, it is ok to put your food in it. You don’t want your food to get to warm and you get sick while on your camping trip.

We recommend buying a RV to 110v adapter and plug in your trailer the day before. If the 110v plug is on at least a 20 amp breaker and there isn’t much else on it, you can use it to power your trailer for the lights and refrigerator. This will not be enough to run the air conditioner or anything big, but it will power the lights and refrigerator. If possible, have a dedicated 30 amp circuit installed in your break box for your camper. This will allow you to 

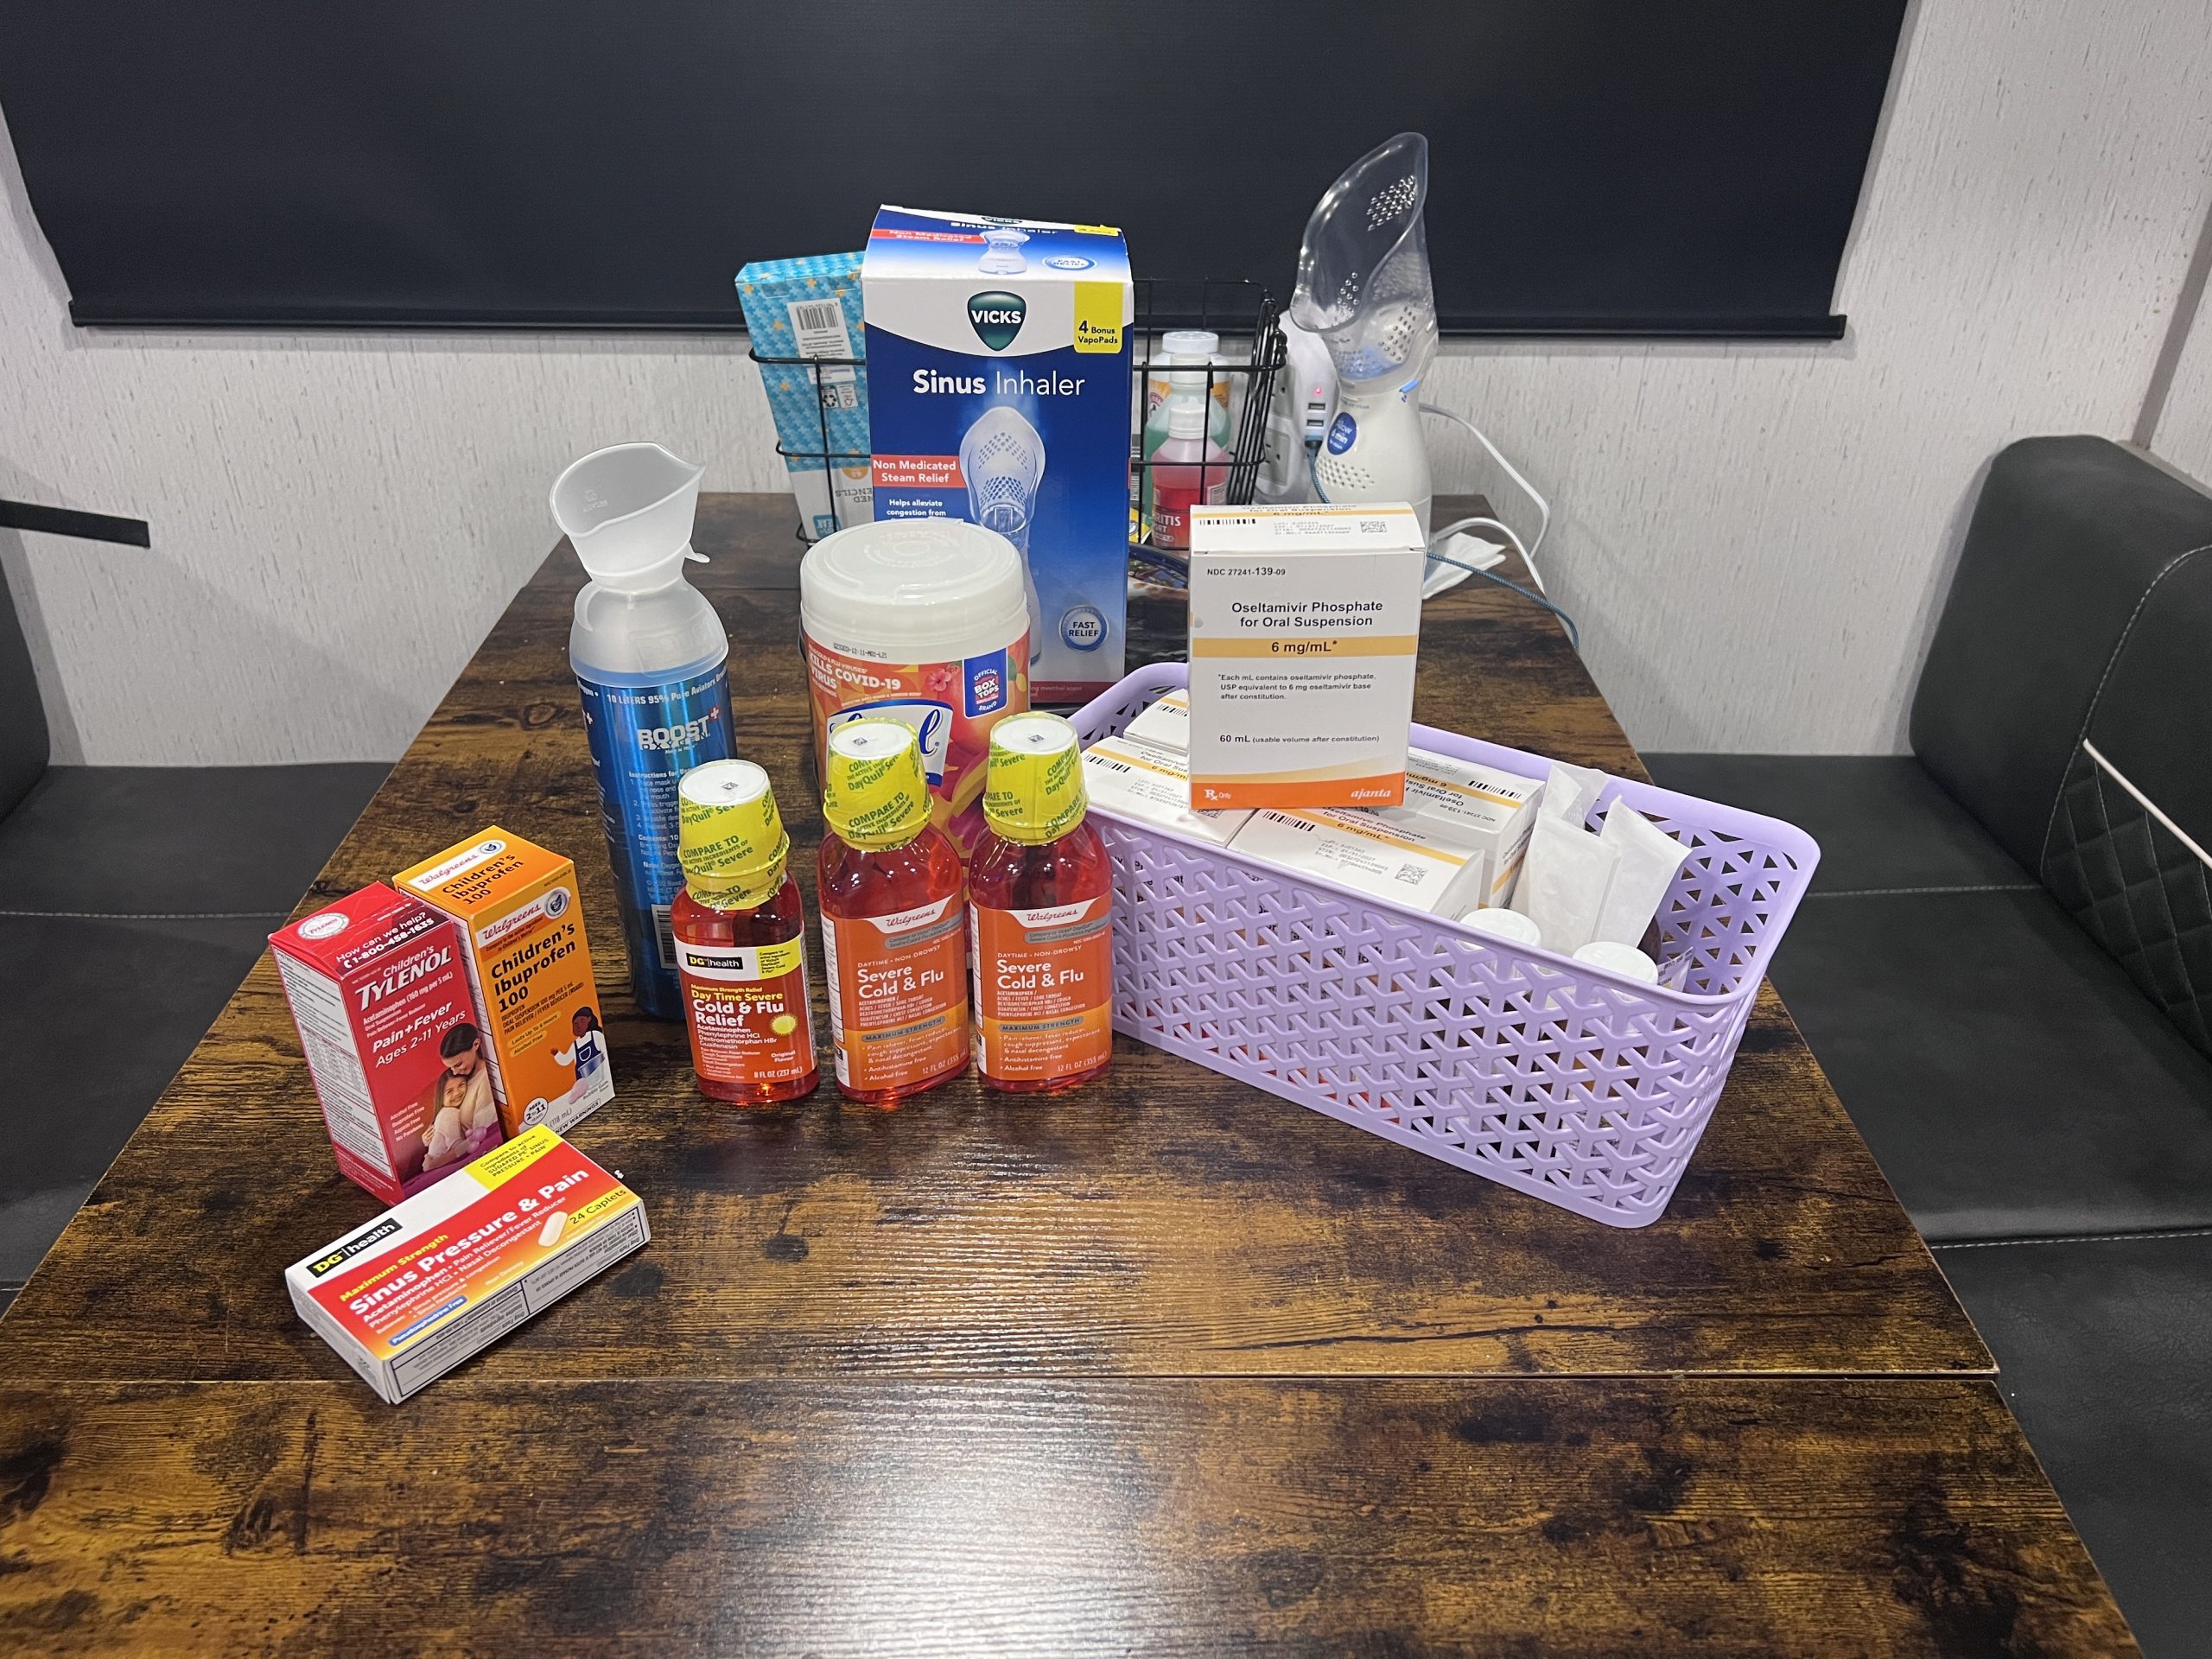
4 – Check the First Aid Kit to make sure it is fully stocked

While camping is supposed to be fun, it can also be dangerous. Whether it is just a minor cut or a broken leg, you need to be ready to do what you can. When you are getting your RV ready to go camping, make sure that you check your first aid kit. Make sure that any creams or anything else that may have an expiration date is checked. Also make sure that you replace anything that was used. 

Whether you make your own first aid kit or buy one(like this one), go through it and write down what is all in it. While you are going through it check it off on the list showing that it is there so you will know exactly what you need to replace. 

5 – Do a thorough check of the outside of your camper

This is probably one of the most important things in this list. Failing to check on some of the things on the outside of your camper could have serious repercussions on your camping trip. 

Check your tires! Make that each of your tires is aired up to the proper PSI. Check the treads on the tires to make sure they still have plenty of tread on them. Having a blowout while you are driving at highway speeds could cause you to have a severe accident or at the very least do some pretty significant damage to your RV. 

Check your wastewater connections. Make sure that the cap is on the outlet and tightened down. The last thing that you need while your driving down the road is to get pulled over by the police and be accused of dumping waste water down the road. 

6 – Check Propane Levels

Check your propane bottles; verify that all the connections are tight and each bottle is turned off. Some people will say that leaving them on all the time is ok, I would HIGHYLY recommend turning them off. Leaving the tanks on while traveling can be really dangerous. If one of the lines comes loose, or get punctured, propane will fill whatever protective cover you have on them. One small spark is all that is needed to turn a small leak into a major issue!

Are your propane tanksl full or almost empty? How do you check it? Most smaller tanks do not come with gauges, so here are a few ways to check and see how full your propane bottle is.

Use Water

Liquid propane is very cold! Get you a pitcher of warm to hot water and slowly pour it down one side of the tank. After you have dumped all the water, run your hand down the side of the tank and feel where it turned cold. Where it turns cold is the level of you tank.

Weight

Most propane bottles come with two different weights stamped on the side of the bottle. One is Tare Weight(TW) and the other is the Weight Capacity(WC). The TW is weight of the bottle empty. If you happen to have a scale with you, weight your bottle and subtract your TW from it. This will tell you how many pounds of propane you have left. Granted this, by itself doesnt tell you a lot, but take it one more step and you can get a fairly close idea. 

Now that you know how many pounds are in your bottle, divide that number by the difference between the TW and the WC then multiply it by 100. This will give you the percentage that is left in your bottle. 

There are two problems with this method though. While you are camping, I highly doubt that you will bring a scale with you. If you live full time in your RV, then you might have a scale.

External gauge

While both of the above methods will work, they are relatively a lot of work. You can buy your an external gauge to install inline with your bottles and you will have the fill level at a glance. This is the gauge that we use on our grills. This will work on the propane bottles for your RV as well, but I think there is something better than this.

One of the things that we have on our camping wish list on amazon, is the Mopeka Pro Check Bundle Propane wireless tank monitoring system. We will be getting it pretty soon, and we will do a review video on it when we get it. If you are reading this a while after this post was written, I will include a link to the video.  This bundle comes with two magnetic tank sensors and a LED tank display. You simply place the magnetic sensor on the bottom of a propane tank, it then uses ultrasonic detection to determine the fill level of the tank. It will transmit that level to the LED display that you can mount somewhere in your RV. You can also get the reading on your smartphone using a free app and can set alarms per tank connected to alert when a tank gets low.

7 – Do a thorough check of the inside of our camper

Now that we have checked the outside, let’s move to the inside  and get it ready. There are alot of things that you should check on the inside of you RV and every RV is different, so Im just going to hit on some of the top things to check. We recommend making your self a check list of things the check on your RV. Click here to get a copy of the check list that we use for our RV. 

Check your water connections

Having a water leak in your camper can be very destructive to it. Camper are made from very lightweight material so getting it weight can be a very bad thing. Go though each of your water connections and make sure everything is hand tight. Check your sink, you toilet, dishwasher if you have one, outside kitchen sink, etc. Anywhere that has a water connection that you can get to needs to be checked on a regular basis. The bouncing of driving down the road and loosen them up.

Food and drinks

Dry food and drinks can be brought early and put away in its place in your RV. Keep the cold stuff inside until the day you leave and only after your refrigerator has been on for at least 4-6 hours. 

Toiletry items

If you do not go camping on a regular basis or live full time in your RV, make sure you stock up your rv with toiletry items the day before. Things like toilet paper, tooth brushes, tooth paste, mouth wash, soap, shampoo, conditioner, dish soap, etc

If you go camping on a regular basis, buy extras of your toiletry items to keep in your RV. Most of these items don’t take up a lot of room and have long shelf lives. 

8 – Check your vehicle

You also need to make sure your vehicle is ready to tow your RV or be towed by it whichever the case may be. If you are towing your vehicle behind a motorhome, most of this will not apply, but if you have a towable RV, then this is very important.

Tires

Check your tires! Make sure that your tread is good, especially the rear wheels. Check the tire pressure to make sure it is set to the proper PSI. We recommend doing this the day you are leaving to go camping. Temperature changes outside affect the pressure of your tires so what may be good the day before while it was warm, might not be enough the next day if it is colder outside. Here in Texas, this is a regular occurrence. At the time of writing this post, it is about 40 degrees outside. Yesterday the high was 78 and tomorrow it is suppose to be in the upper 60’s, lower 70’s. 

Check the fluids

Check all the fluids in your vehicle. If you are getting close to your normally scheduled oil change, go ahead and get it changed. Towing a heavy RV, adds additional wear and tear on your engine than normal driving does. You engine will typically operate at a high RPM while towing than it does without the extra weight. 

Check your brake fluid, transmission fluid, water in your radiator and even your windshield washer fluid. Make sure everything is within normal limits or topped off before you leave. 

9 – Gather all the clothes

Lastly, gather all your clothes that you are going to be taken with you. We will typically get everything packed a day or two before we are scheduled to leave. Get everything out to your RV and put in their place. Unpacking everything when you arrive at your camp site just takes away time that you could be relaxing. 

If you have kids, get them involved in this part of it. Tell them what the forecasted temperatures are suppose to be and let them choose what they want to wear. This allows them to have some input to the camping trip. This will also give them a sense of pride on what they wear during the  trip. Obviously, make sure that what they pick out is appropriate to the weather. One of our kids is very much into JoJo Siwa and will choose a her favorite long sleeve shirt even when it is 80 degrees outside.

10 – Clean RV and make beds

Beds and linens

When we get home from a camping trip, we will strip our beds and wash all the sheets. We also grab all the towels, wash clothes, and dish rags and get them washed as well. After they are washed, they can be brought back to the camper for storage or you can store them inside your main house and brought out when you are getting ready. Whichever way you choose to do, we recommend not making the beds until you are getting ready to go camping to keep them fresh for your trip. 

Take any bath towels, wash rags, dish towels, etc to your camper. Again keep them folded to maintain their freshness better. This also allows you to gather them while Camping easier as well.  If the place you are camping at has shower facilities you can use them instead of your rv show to give you more room to shower. Most RV bathrooms are cramped and the shower doesn’t have a lot of room. 

Sweep your floors

The last thing that you should do when getting ready to go camping, is sweep your floors. All the traffic of setup has undoubtedly tracked dirt inside your camper. Things may have been dropped, spilled or otherwise on the floors. When you are all done, sweep thoroughly. Sweep under your slides as well. If something was dropped and got kicked or bounced under a slide, when the slide is put back in, it can damage your floor. 

The last thing that you want is to have a dirty RV that you have to clean when one of the biggest reasons to go camping is to get away from the normal day-to-day grind and relax. So do it before relax time starts.

Conclusion

I hope that this post helped you and we thank you for taking the time to read it. If you have any tips or things that you do to get ready to go camping, leave it in the comments below so others can benefit from it. 

If you enjoyed this post, please considering following our blog and us on social media. We are on Facebook, Instagram and Youtube. Facebook and Instagram will have more behind the scenes type content, and we will post on them when a new post come out. On our Youtube channel, we are going to start doing companion videos to some of our posts for those that would rather watch a video rather than read a blog post. 

Until its time to Hitch Up again, 

Happy Camping

NOTE: This post was originally posted earlier this year(2023) when we first started our blog. I am posting old posts to get caught up with the present and then I will start writing new posts.

Remodeling our Bunkroom in Our Kodiak

By now, we have gone camping a couple of times. Spreading several nights in our camper has given us an idea of what we like and don’t like. After spending months trying to find the right floorplan, you would think that it would be exactly what we wanted.  If you think about it though, even though you find the best option available, something can always be changed to fit your life.

Why Are We Remodeling

So why are we remodeling? While most of our RV is good, the one thing that we  didn’t like is that the bunk room doesn’t have a lot of room in it. There is basically just enough room for one person to walk between the beds. The other concern that we had was our kids falling off the top bunks. We have already had one of our kids fall off a top bunk in our house, thankfully he landed on the bed below. 

This is what it looked like when we bought the RV. On the left was an offset bunk bed and on the right was a top bunk that folded up and a Jackknife couch underneath. My wife can think very fast on her feet and often makes things work the best with the littlest amount of time required. So she suggests that we remove the bottom bunk on the left, take out the couch, and build a new double bunk on the right. Then build a cubby shelf on the left for clothes, shoes, and toys.

This would give more floor room for our kids to play on rainy days and more storage for their clothes. The only storage in the bunk room before was two drawers under the bottom bunk and one very deep cabinet.

That is not enough room for three kids, their clothes, toys, and shoes!

When we rebuild the beds, they would need ladders so we decided to incorporate a bed rail on the side as well. This solved the concern of our kids falling off the top bunk. Now it was time to sketch out our plans so I could do the figuring out how to build it and the materials that we would need.

While my wife is the idea/designer person, I am the one that figures out how to do it. Then we both work together to make it happen! We make a great team if you ask me.

Demo

With our new design figured out and material bought, it was time to get rid of the old and make room for the new. That old was only a couple of months old but that’s not the point. We took out the lower bunk, couch, and upper bunk on the right. Here is the clean slate that we had to work with

When we took out the lower bunk on the left, we noticed that we had the power wire and the rear water connection that we had to deal with. So we had to change our plans slightly to make a cover for the wires but also be functional in the space. My wife jumped into action and said, let’s make a step to cover the wires and function as a seat to get dressed or put on shoes too.

It took all of about thirty minutes for my wife to completely demo the bunk room while I was making lunch for the kids. She is a beast when she sets her mind to something! One thing is for sure though, it really opened up the room!

Building New Bunk Beds

Now that the bunk room was empty, it was time to start rebuilding. The plan was that my wife would start working on the bottom bunk on the right, while I started working on the cubby shelf. She started measuring and I was off to my workshop. It wasn’t long before I was called back into the camper to get my opinion on something and we just started focusing on the bunk beds together.

That is normally the way that it works out when we do projects, together is better!

Trying to figure out where the support boards would go for the top bunk was probably the most challenging of the entire build. We wanted it high enough for our kid on the lower bunk to have enough room to sit up on her bed. In the same thought, we wanted our son on the top bunk to have enough room too. We also needed to consider how big the top bed structure would be. I figured that I could cut a 2×4 lengthwise at an inch and a half and it would be strong enough; after all that is what the top bunk was made of from the factory. 

Off to my workshop for me it was, while my wife finished putting the bottom bunk together. I ripped a few 2×4’s lengthwise at one and a half inches and drilled some pocket holes in them to connect them together. I cut the back board to length and went inside to attach it to the wall pretty much where the original board was screwed to the wall. The the side boards went on the ends. I decided to over-craft it some by using three center cross pieces instead of just two that would’ve worked. After the center pieces were in place, the front board was screwed into place. 

With the framework done, we put a ½” piece of plywood on top and screwed it into the framework. It made it pretty solid. We probably could’ve stopped there and been just fine. However, we still didn’t fix one of the problems that we had about the bunk beds; our kids falling off the top bunk and how to get up on the top bunk too. 

Now it’s time for the ladder

We had talked about putting a rail fence along the side with slats about every six inches or so. We liked the idea so I ran with it. First though, we needed a way to get up to the bed. For that, we needed to build a ladder. 

Again I went back to a 1 ½ x 1 ½ board.  This was the perfect size for strength and for slimness. I also took my router with a 1” roundover bit and rounded off the top of each rung to make it easier on our kids feet. I put it together with glue and a pocket hole screw. Then I rounded over the side rails as well to make them easier to hold onto. 

After it was all put together, I took it out and installed it onto the bunch. Not only did this give our kids a way to climb up to the top bunk, but it also gave a close to center support for the bed, making it VERY sturdy. 

Next up was the side railing

I hade planned on using my table saw to cut a groove into bottom and top boards. However, after the second cut, the motor on my table saw all but seized up. I was forced to use my router to cut the groove. While it worked, it wasn’t as neat as it would’ve been on the table saw. 

With cutting a 2×4 down to an inch and a half, it left a piece about a half inch thick that was perfect for the slates in the side railing. So I took those pieces and cut them down to about 11 inches long and put them in the grooves and glued them in place and tacked them with a brace nail to hold them while the glue dried. Next I took my router and rounded off the top board and sanded everything really well.

The next day I took that piece out and attached it to the side handle of the ladder and the other end to the wall. It didn’t match up perfectly to the ladder rail, but it was pretty close. 

THAT’S IT, BUNK BED IS DONE!

Building A Cubby Shelf

With the bunk beds done, it was time to move onto the cubby shelf. We decided to build a four foot by four foot 12 cubby shelf. This allowed for a four by four grid of approximately 11”x11’x12” deep each. We decided to go with 1×12 yellow pine boards rather than plywood. That way, later, when we stained them they would look better. 

I started out by cutting six boards to four feet. These boards would be for the outside borders and the three horizontal shelves. On the border boards, I routed out  grooves approximately ⅜” deep at 12” on center. This is where I goofed a little. 

On the ends of each board I routed half the thickness of the boards on each connecting piece then put them together to make a solid matched corner. I should have measured from the edge of the joint instead of the edge of the board beforehand.

 I discovered after everything that built that the two outer cubbies were about ⅜” smaller than the middle two were. However, this defect is minor and the totes that we bought for this shelf still fit. 

I got lucky!

Once all the grooves were cut, I started putting it together. I glued all the solid pieces together and then put a few brad nails in to hold them while the glue dried. Once the full length pieces were in place, I cut the upright pieces and slid them into the grooves that I cut. I made another oopsy in this process as well, because a couple of the grooves that I cut were a little too small for the board to seat well in them. However, it was too late to try and fix it because it was all glued together. 

I had to make due with what I had and did manage to get most of them to seat most of the way. I glued each of these pieces as well and the clamped all of them together and let it sit overnight to dry.

The next day, I moved it inside and passed it off to my wife who did an amazing job at staining it all. 

Building the Ladder and Bed Rail for the Last Bed

The ladder for the last bed was basically a redo of the first one, but I learned from my mistakes and made this one better. I made it all in one piece before I rounded the edges so it all flowed together very nicely. This one turned out better because when I made the channels for the rail slates, my table saw went out so I had to do it with a router. Let’s just say, it didn’t turn out the best. 

I also had to make a step for the bottom that would hide the power and water connection that came in under when the bottom bunk was. For the step, I used a piece of ¾” plywood. I cut it into a trapezoidal shape and rounded over the front of it to make it look nice. I then made some 1 ½” x 1 ½” risers to hold the step in place and attached it in place to the wall and cubby shelf. 

I took a piece of the ¼” plywood that we took out from the bottom bunk and cut it to fit on the sides of the step to hide power and water connections. I then took the ladder and side rail piece and put it on top of the self and over the cubby shelf and screwed it to the shelf and the step. 

Finished Remodel

After everything got stained, we were done!

I will say that I really like the way that it turned out. As far as space goes, our kids have so much more. They also have more storage for clothes and toys. The only real thing that was lost was the jack knife couch but honestly, I really don’t see them sitting on it anyway. I think this is the way it should’ve been from the factory, but hey, I’m kind of partial too.

There are two things that I did that I wish we wouldn’t have. 

The first one is that I wish I would’ve made the first ladder and railing the same as I did the second one. The second one ended up looking a lot better than the first because I did it as one piece. However, just like with anything in life, the second time you do something is always better than the first. 

The second thing is when we installed the bunk beds, I misjudged how thick the slide wall was and ended up using screws that were a little long and they ended up going through the side of the camper and the bottom of the slide. I changed all the screws out when my wife noticed it for shorter ones and used clear silicone to seal the holes up, but you can still see them. The ones that went out the bottom, however, I would’ve had to tear apart the entire bed to change them out so I just cut them off and sealed them.

All things considered though, we think that it turned out very well and our kids love the room. Honestly, I think this is the way that the manufacturer should’ve done it to begin with. On the flip side though, I understand why they put the jackknife couch in and made it the way that it was. With the couch, there is a place to side when the couch and the top bunk are folded up. There is also another place for someone to sleep when they are folded down. 

What do yall think about the changes that we made? Leave a comment below and let us know. Also, please follow us on our Facebook and Instagram pages for some behind the scenes looks and to get notifications on new posts.

Until it is Hitching Time again,

Happy Camping!

NOTE: This post was originally posted the first part of this year(2023) when we originally started our blog. I am posting old posts to get caught up with the present then I will start posting new ones.

Our First Storm In Our RV

I always knew that it would happen eventually, Tonight it did. Tonight we had our first Severe Thunder storm in our camper. We got about an hour of solid downpour and about twenty minutes of pea sized hail. Let me tell you what though, that pea sized hail, sounded a whole lot bigger on the roof of our camper. 

We have like that next three or four months planned out on when we will be camping. Basically we will be doing just shy of three weeks in our camper and about nine days at home for the forseeable future. So canceling our plans is not really in the cards. Granted we could if we wanted to but honestly what is the point?

Weather Forcast

We are planning to live in our RV full time as soon as we are able to sell our house. At that point, we wont have the option to cancel our camping plans, because then it will be living plans. Also, I am still working full time so where we camp has to be with in a reasonable distance from my work. We really cant say, “Well it looks like it is going to rain for the next four days, lets go stay at a different campground.” That campground might be more than an hour drive to my work and I really dont want to drive that far for my job.

This is what the ten day forcast looked like on the day before we went camping…

The first day we were here, IT WAS HOT!! It made it up to about 95 with about 50% humidity on May 5th! About 5pm, the rain came in. It wasn’t really a storm, just a good steady rain. That was on Friday. 

On Saturday, it showed a chance of rain again, and as I looked at an updated on Saturday morning, the forcast had changed to this…

Through out the day, I kept checking on the radar looking for when the rain would hit. It started out being forcast to hit about 4pm, then it got moved back to 6pm, then to 8pm and finally around 10pm. 

It Has Arrived!

This time the metorologists finally got the prediction right because it started raining…and raining…and raining some more. Then the pinging started, and got more and more frequent until it seemed to be hailing more than it was raining. 

There is a open air pavilion at the camp ground that we are staying at and people often take their vehicles down to it when a severe storms moves in. About the time that the hail started was about the time that I started to see headlights come on and people moving their vehicles down. My thoughts though, even if I was to move my truck it would still get hit and even though the pings we were hearing sounded like golf balls, it was only about pea sized. So why get out and get soaking wet and more than likely get stuck in my truck for a couple hours or even sleep in it and leave my wife with our kids. 

She was scared enough as it was with me being here to comfort her, I cant imagine what she wouldve felt if I wasnt. No vehicle is worth that. 

The Icing On The Cake

About ten minutes into the rain, the power went out! That meant only a few lights, no fans, and of course, no A/C! As I am writing this at about midnight, it has dropped down to 64 degrees, thank goodness, but when the power went out, it was still in the 80’s! So it has gotten a little warm in here and a little stagnat as well with no air moving. 

Thankfully we are in the county that I work for, so I know where to look to find information. I know who the power company is here. The average person here, wont know that kind of stuff. So they are basically just left in the dark in more ways than one. I know that I can pull up a website and see the area affected by the outage, how many people are without power, the status of repairs and en ETA of when it will be back up. Unfortunately, as I am writing this about midnight, the ETA for repair is about 2:45AM. 

Bless all the electrical workers that go out in these storms and work with electricity to get peoples power back on. If it was me, no way I would be out in pouring rain working on eletrical lines. So thank you to all those linemen and women out there that are willing and very capable of doing just that!

Round One

We have had two rounds of storms come through already tonight, after the first one went through, my wife and I went outside to survey our vehicles and the stuff we had up outside. Things like our grill, chairs and our octogol screened collapsable gazebo. Thankfully there was any damages that we could find, however, the gazebo was collapsed, and thankfully one of the support straps was attached to a fence, otherwise who knows where it wouldve ended up. 

We got the tent set back up and got it staked down, hopefully a little better and gathered all the chairs that were under it and any other loose items that were now scattered all over our camp site. We got everything layed down and put up next to our camper so when the next storm hit, at least they wouldnt be just sitting in the middle of the yard. It really surprised me though because even though, the tent was callasped and flung over about ten feet, the chairs were still sitting in the same spot that we left them an hour or so before. 

On one hand, I fell like we did the right thing by setting the tent back up, putting some corkscrew stakes in the gound to anchor it with and retightening everything. On the other hand though, I think maybe we shouldve just taken it down and stuck it in the pass through of the trailer. We also have the side covers on our gazebo tent so, I also wonder, if those werent on it, would it have allowed enough air to pass through that it wouldnt have collapsed? 

Round Two

After the first round ended and we got the yard picked up and all of our things gathered, round two hit. Thankfully the second wave was nowhere near as big or as powerful as the first wave. I only hear a handful of hail pings and the rain was not as bad as the first wave. 

Our gazebo made made it through the second wave of the storm with only one side collapsing, but it is still standing. We have one more wave to go through before this system passes and we are in the clear. 

Halleluh! 

The power just came back on! It scared the crap out of me when the A/C kicked back on but that is one scare that I will gladly take!  

I don’t know what the rest of the night wil have in store for us. The radar prediction shows that there might be another line of storms move through about 3am, but I’m not sure I trust it. The first wave that came though, the radar prediction showed to be about half the size that it turned out to be. The second and third wave of storms, it didn’t even have.

Now we are winding down on the third wave of storms, the power is back on, and the tent outside, is still somewhat standing. So I think that I am going to go and try and get some sleep and tomorrow, I will continue this with what we found out in the day light

The Next Day

Our kids slept through the whole night with the exception of a bathroom break. They were totally oblivious to everything that happened. Honestly, thank goodness for that. The bad part about it is that they woke up at about 7 am, honestly a little early for going to sleep at 2am but up we got. 

Everything was soaking wet and dirty with leaves and twigs and dirt! We put everything out in the sun to dry off and straighten out and made sure our gazebo tent was staked down well. Overall, it held up really well and only collapsed the first time. The second and third time only the side that we didn’t have staked down collapsed but the tent as a whole stayed up and anchored. 

There was a shoe deep puddle outside our front door but by late afternoon it was pretty well dried up. All in all, everything made it through okay. 

Something We Have To Get Use To

Storms are something we are going to have to get use to, honestly. Once we are able to sell our house and we live in an RV full time, we won’t have the option to go anywhere else when a storm is predicted to come through because of my job. Once I’m able to retire, then that might be a different story, but until then, we just have to live through it. 

Thank you for taking the time out of your day to read this post. Please subscribe to our email list to get emails on when we publish a new update on our adventures. We hate spam as much as you do, so we promise to never sell or otherwise distribute your contact information with anyone! To sign up, simply fill out the form below. Once you click submit, check your email and you will need to verify that you were the one to sign up for our email list.

We would hate it, but, at any time, if you do not wish to receive emails from us for whatever reason, there is a link at the bottom of every email that will unsubscribe you from our email list.

Subscribe

* indicates required

Until it’s time to hitch up the camper again,

Happy Camping!

NOTE: This post was originally posted earlier this year(2023) when we first started our blog. I am reposting all of our old posts to get caught up to the present and then I will start writing new ones.